This is the first part of a multi-part guide on GPU cloud computing for Deep Learning
- Set Up Amazon Elastic Compute Cloud (EC2)
- Theano on Amazon Web Services for Deep Learning
- Set up Microsoft Azure for CUDA Cloud
This guide more generally demonstrates how to register for Amazon Web Services and set up the Amazon Elastic Compute Cloud (EC2).
Contents
- Requirements
- Register for AWS
- Create an Amazon Machine Instance (AMI) on EC2
- Launch and Connect with SSH
- Close instance
- Usage Plans for GPU Compute Instances
- Alternative Elastic Clouds with CUDA
Requirements
- A Linux OS. I have a Macbook
- A credit / debit card
- A phone number you are willing to use
Registering for Amazon Web Services
- Visit AWS and Create a Free Account
The process is straightforward and the usual series of personal details (you need to use a real phone number), email verifications and captcha images to fill out. I registered a Personal Account. You will also be asked to submit card details as this is a paid service. You will then be asked to receive a call from AWS to verify a PIN. This call occurs immediately after requesting. I then chose the Basic support plan on the premise that it would be easier to upgrade than downgrade. You will then receive an email within a few seconds confirming the account is ready. You can then Sign In again.
Free Tier
Half way through writing this guide I received a nice email stating
Thank you for creating an Amazon Web Services (AWS) account. For the next 12 months, you will have free access to compute, storage, database, and application services. Learn more by visiting our Free Tier page.
The GPU computing instances are not free unfortunately. However, a Free Tier instance is a good way of familiarising with launch and connection to EC2.
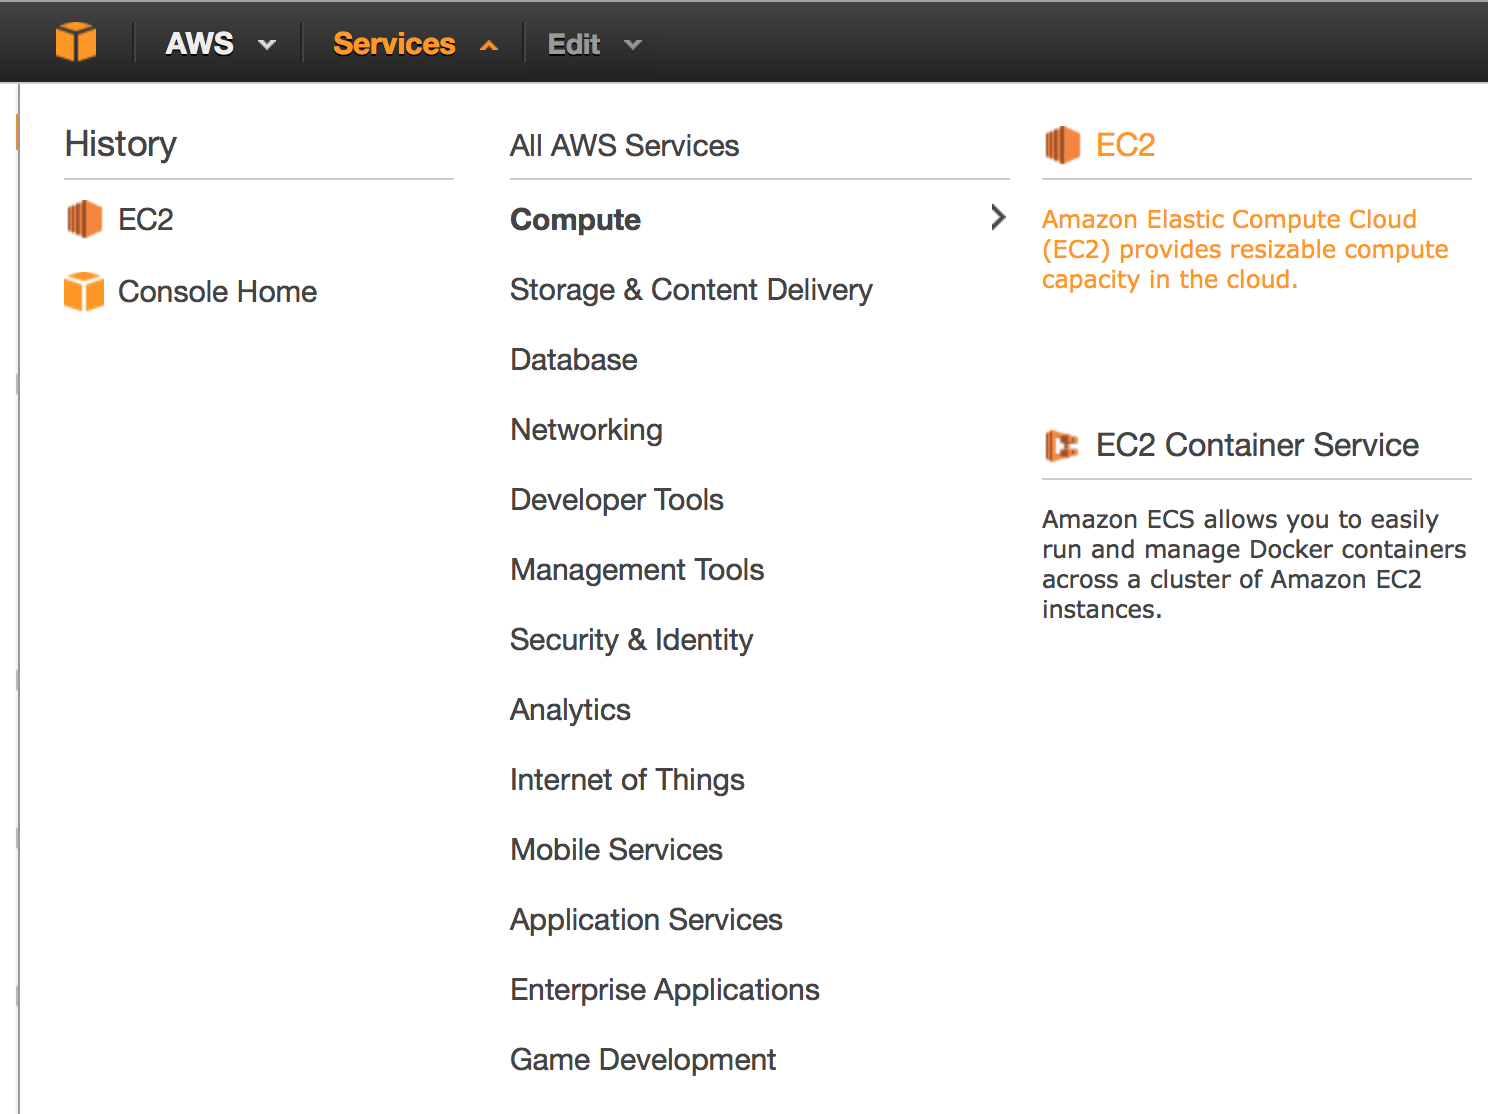
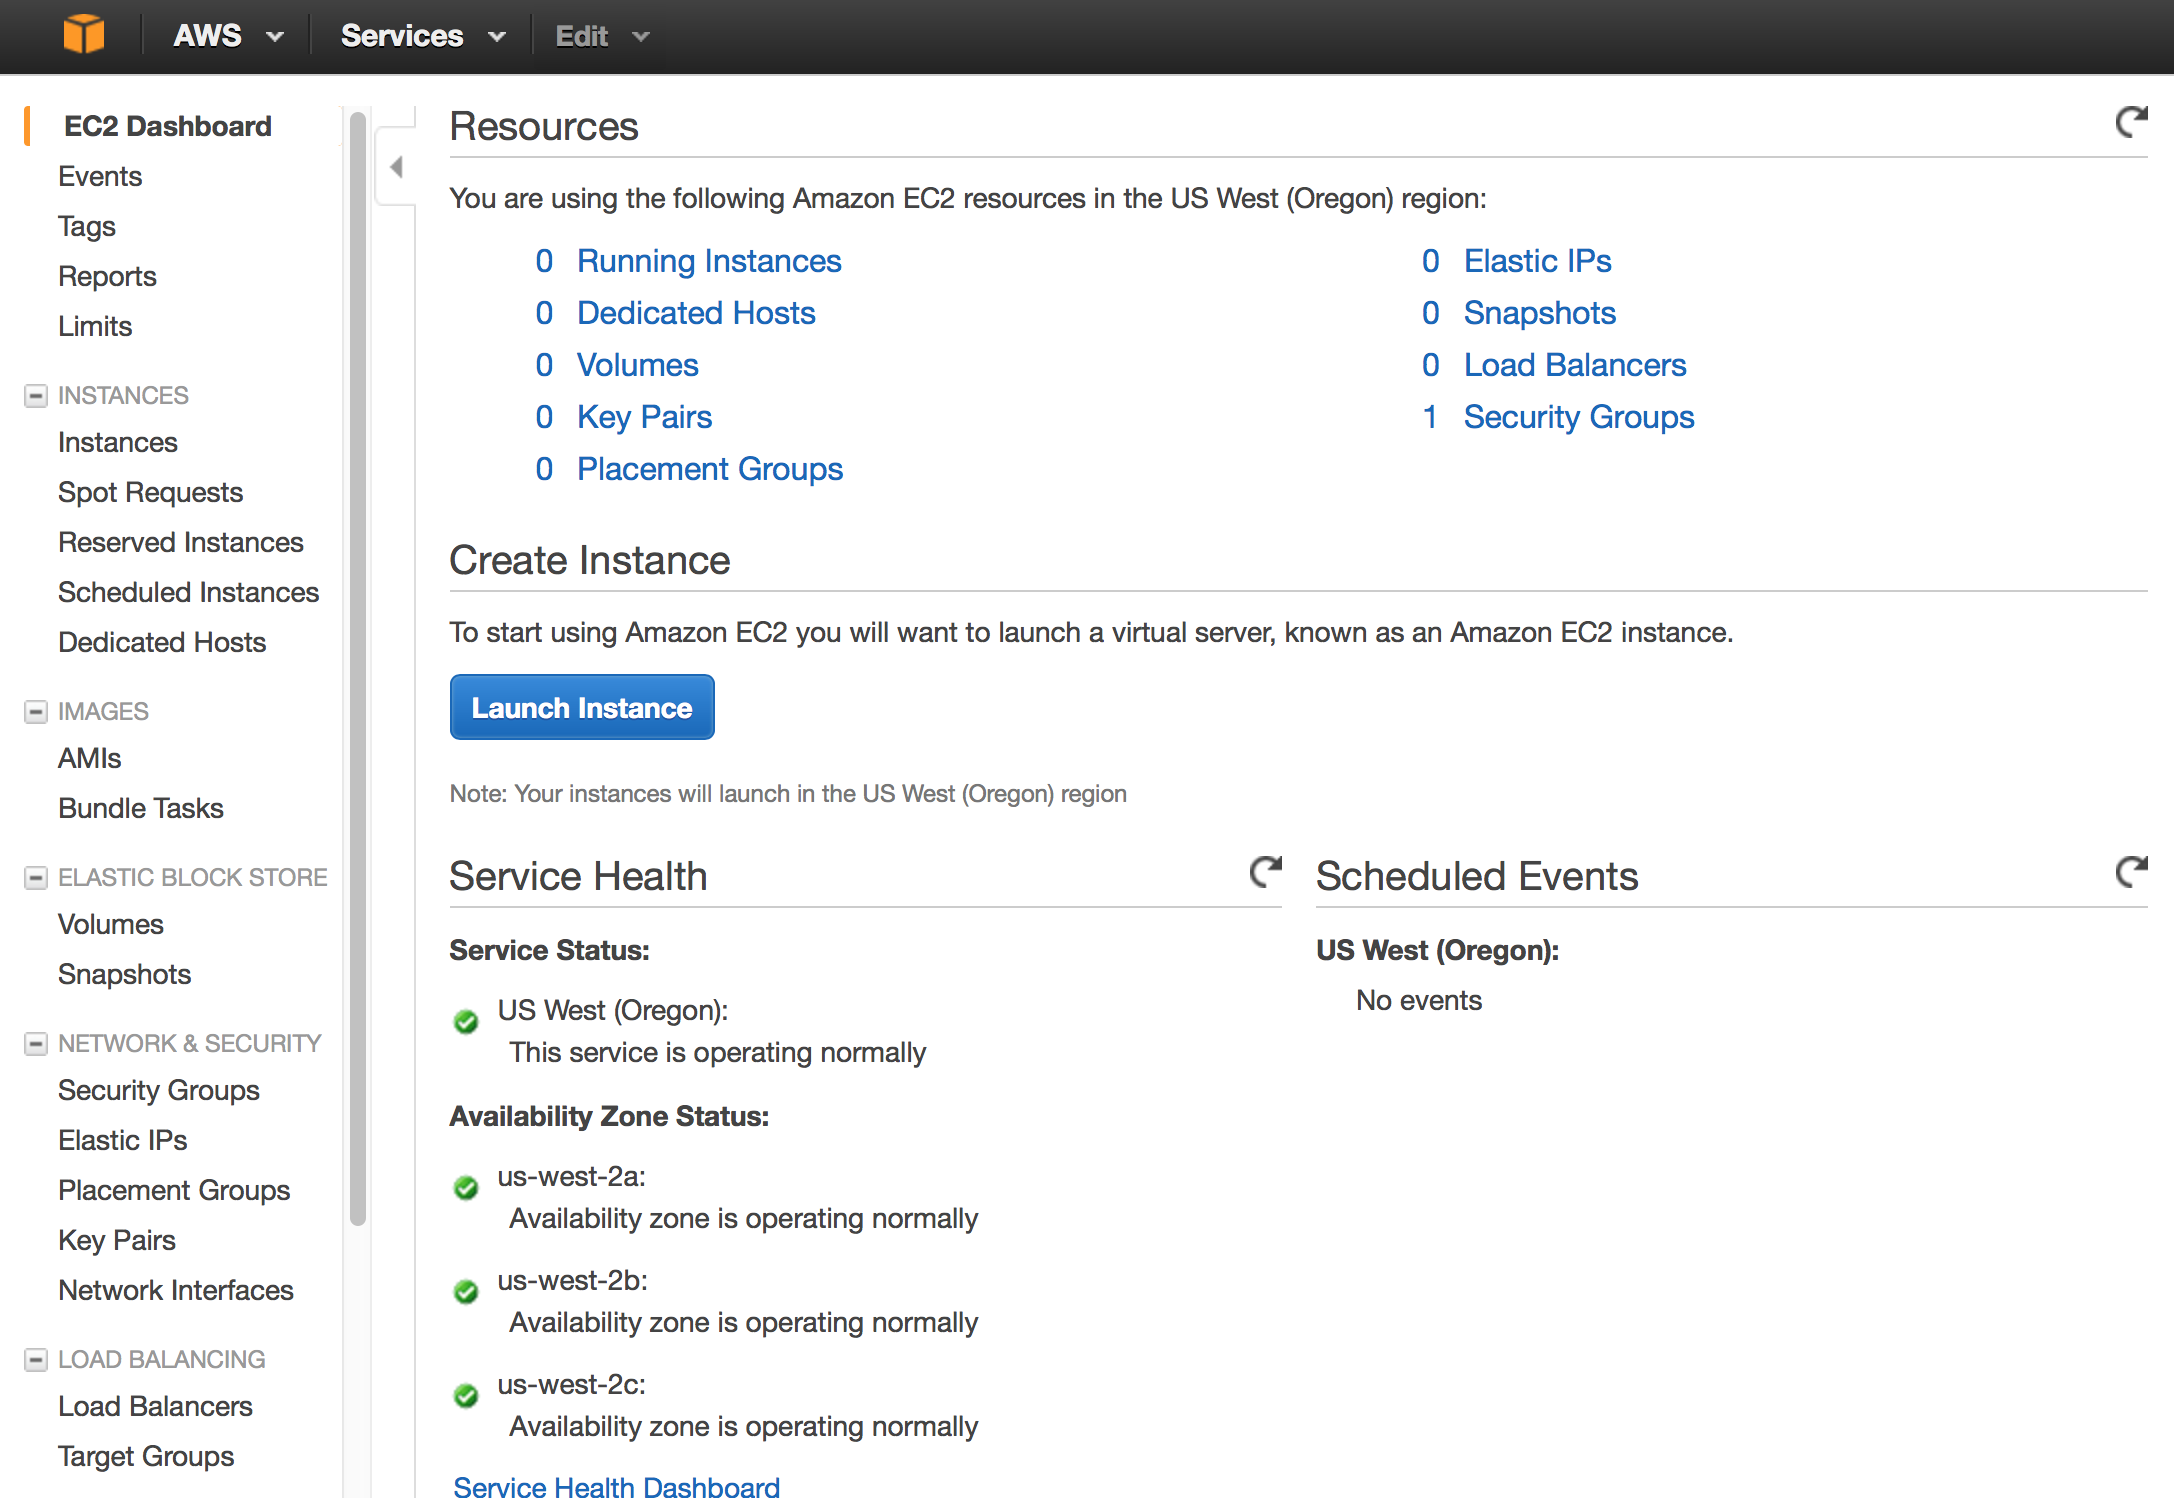
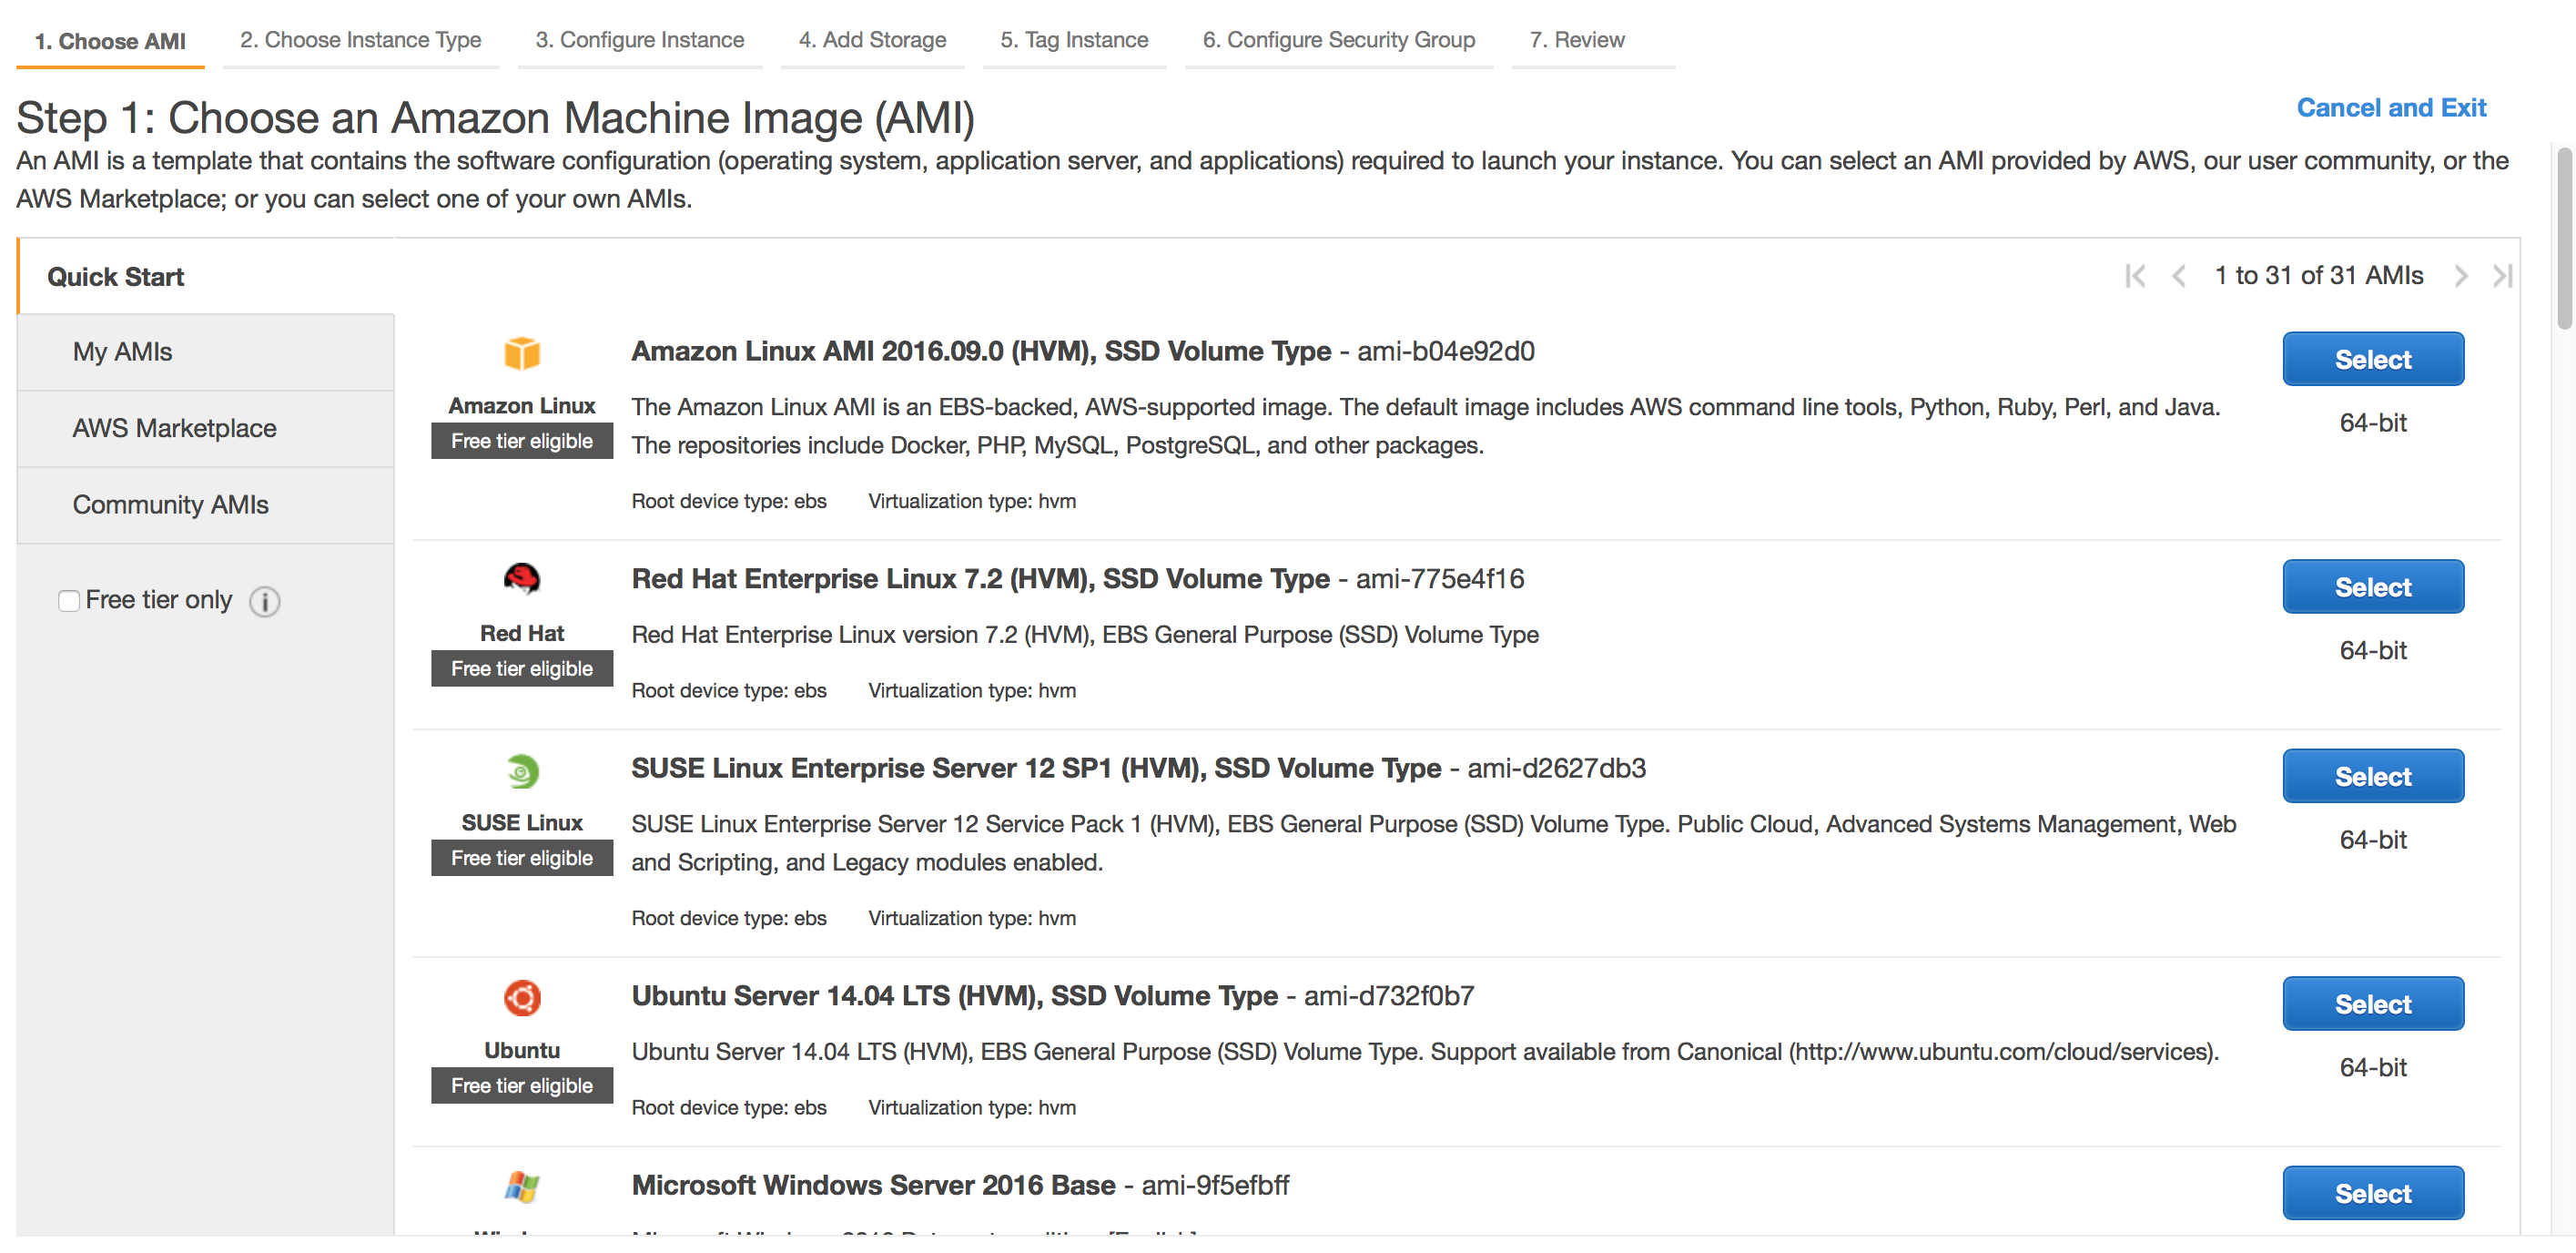
Create an Amazon Machine Instance
- These images show how to set up an Instance
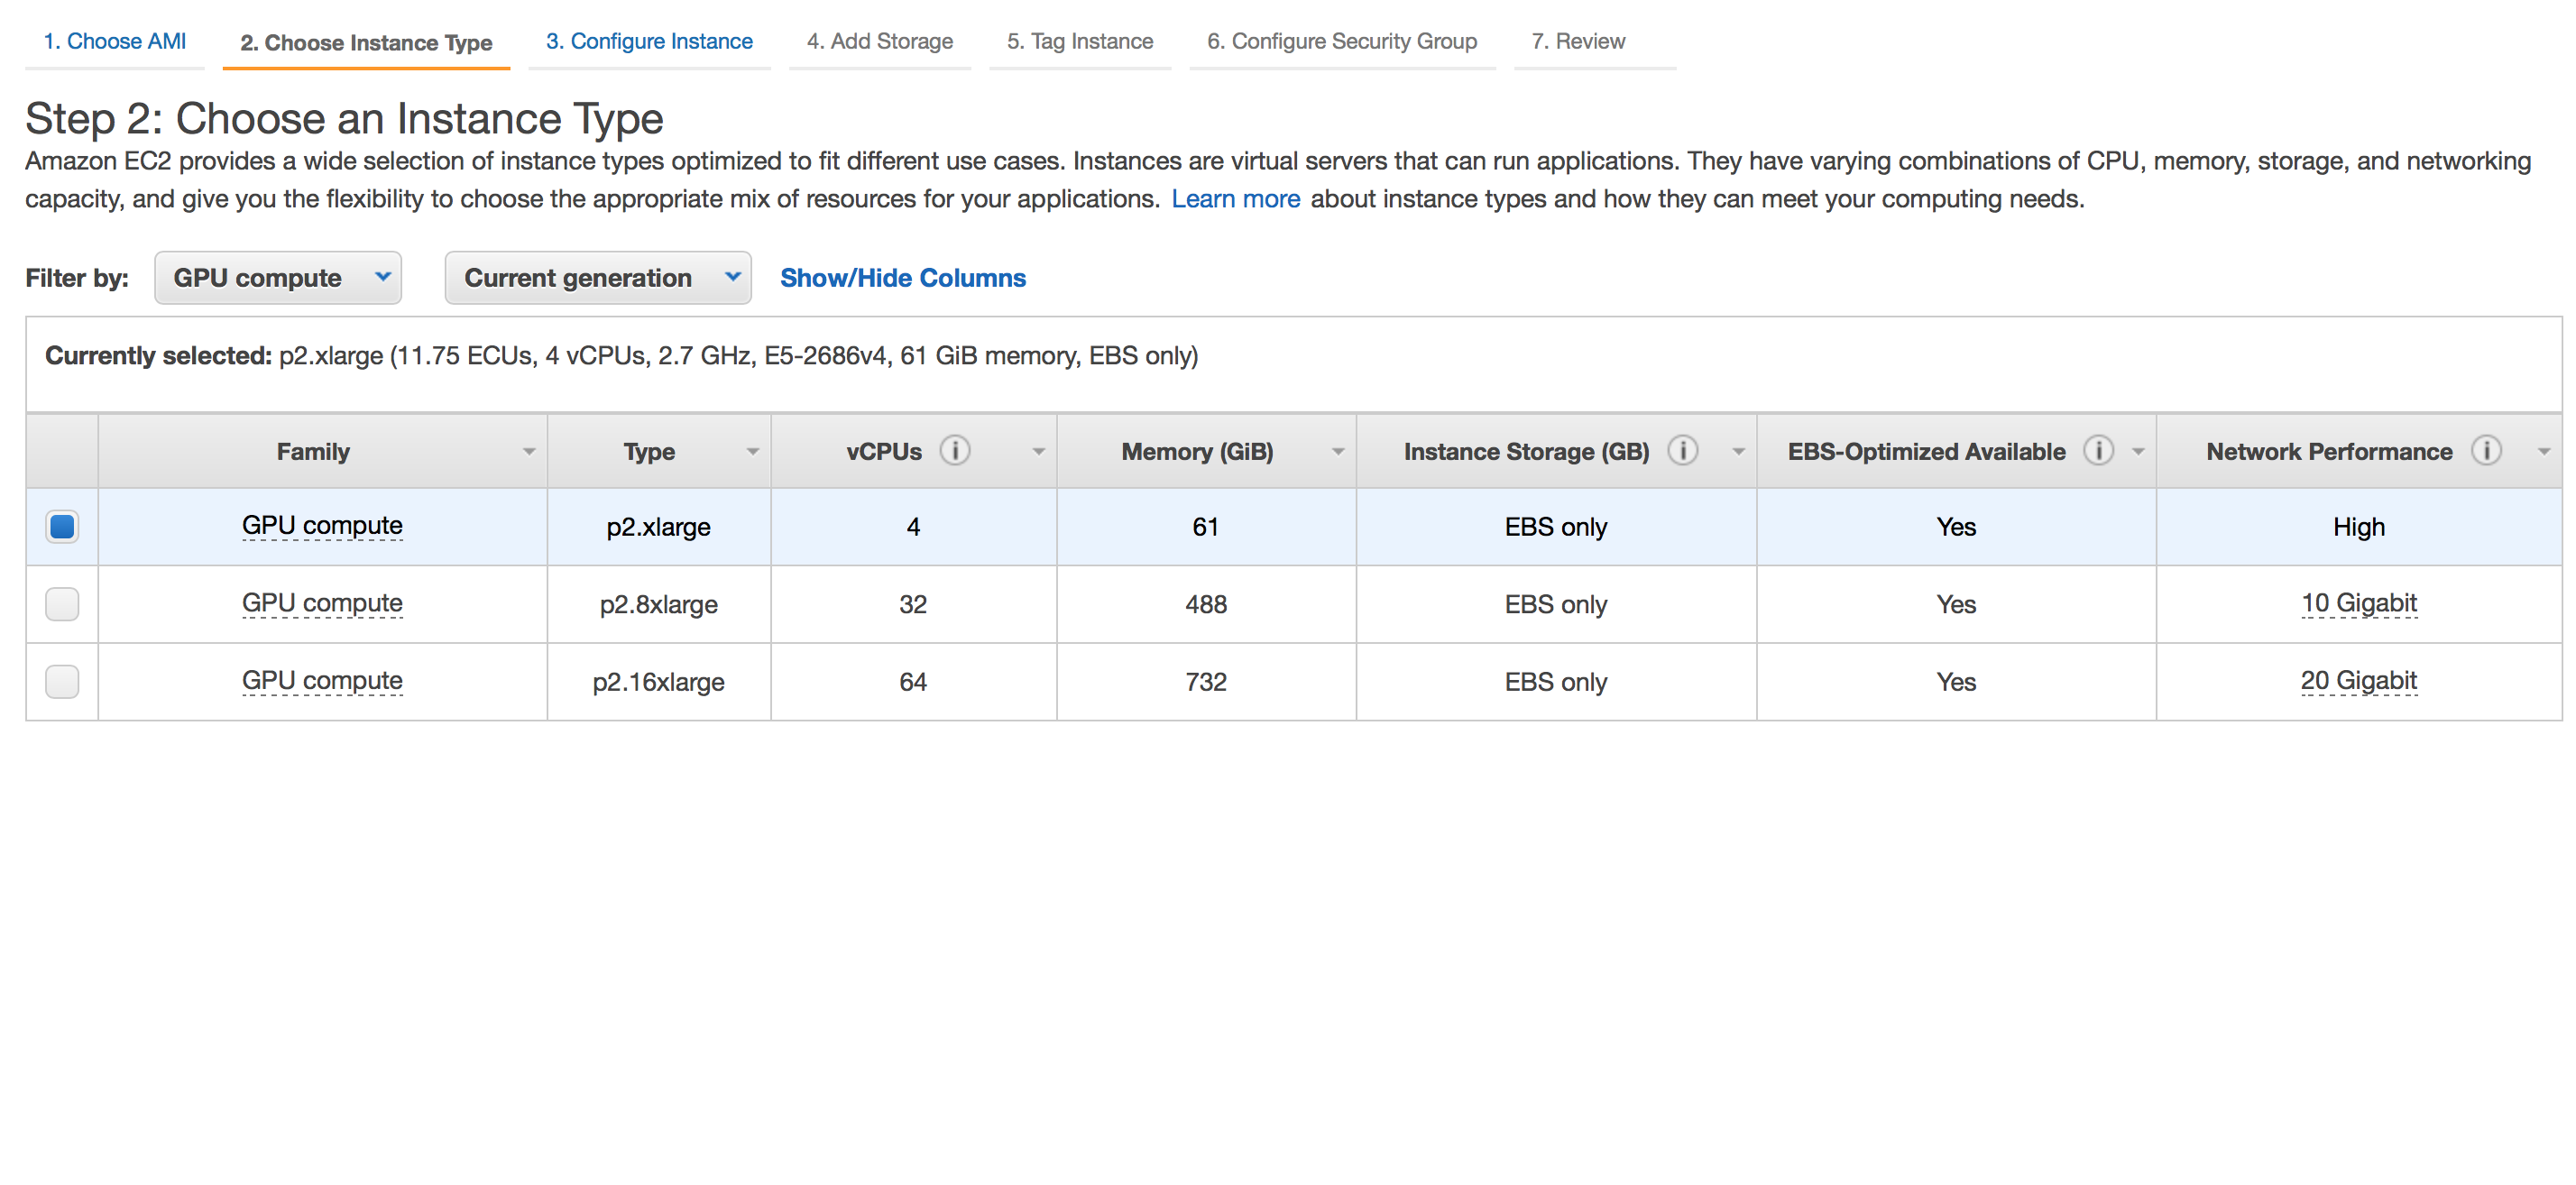
- The Free Tier will be used for this example but GPU Compute should be used in production
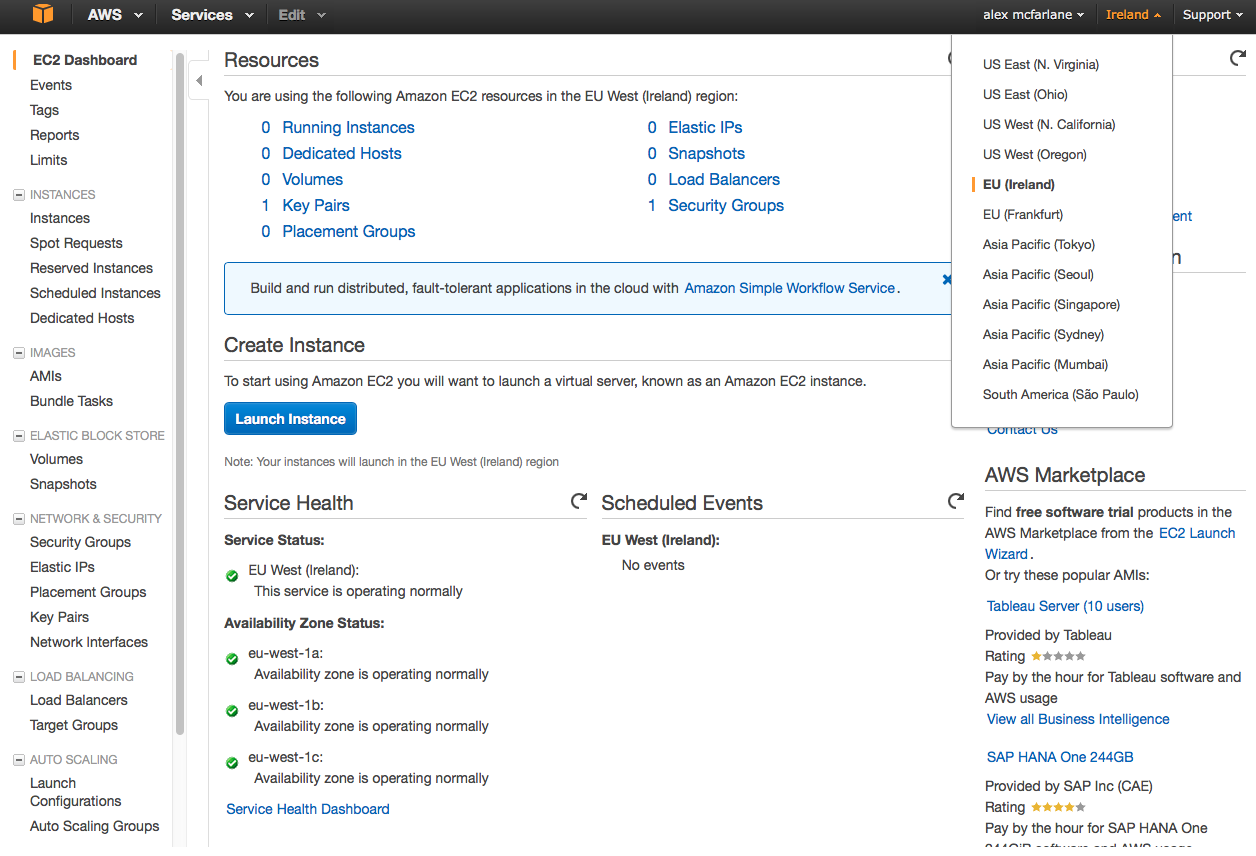
Set Region
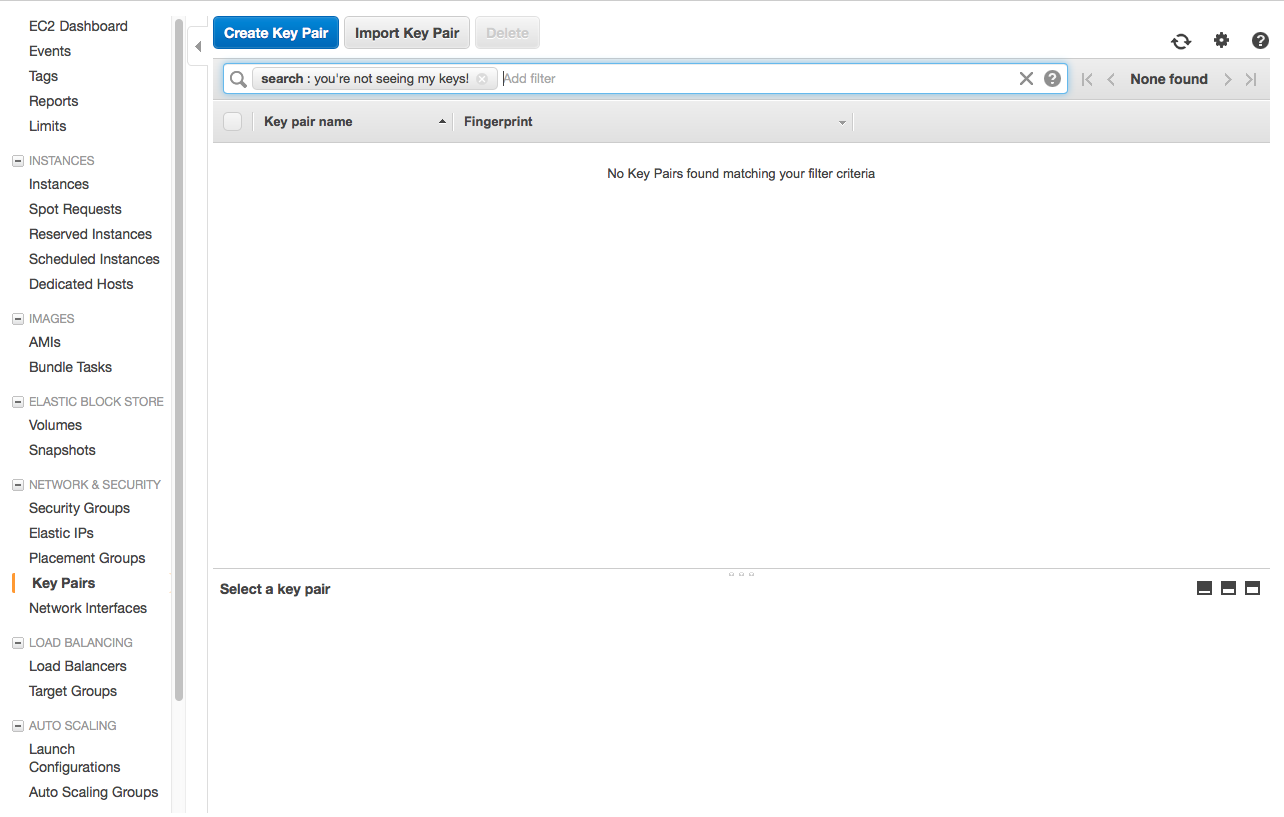
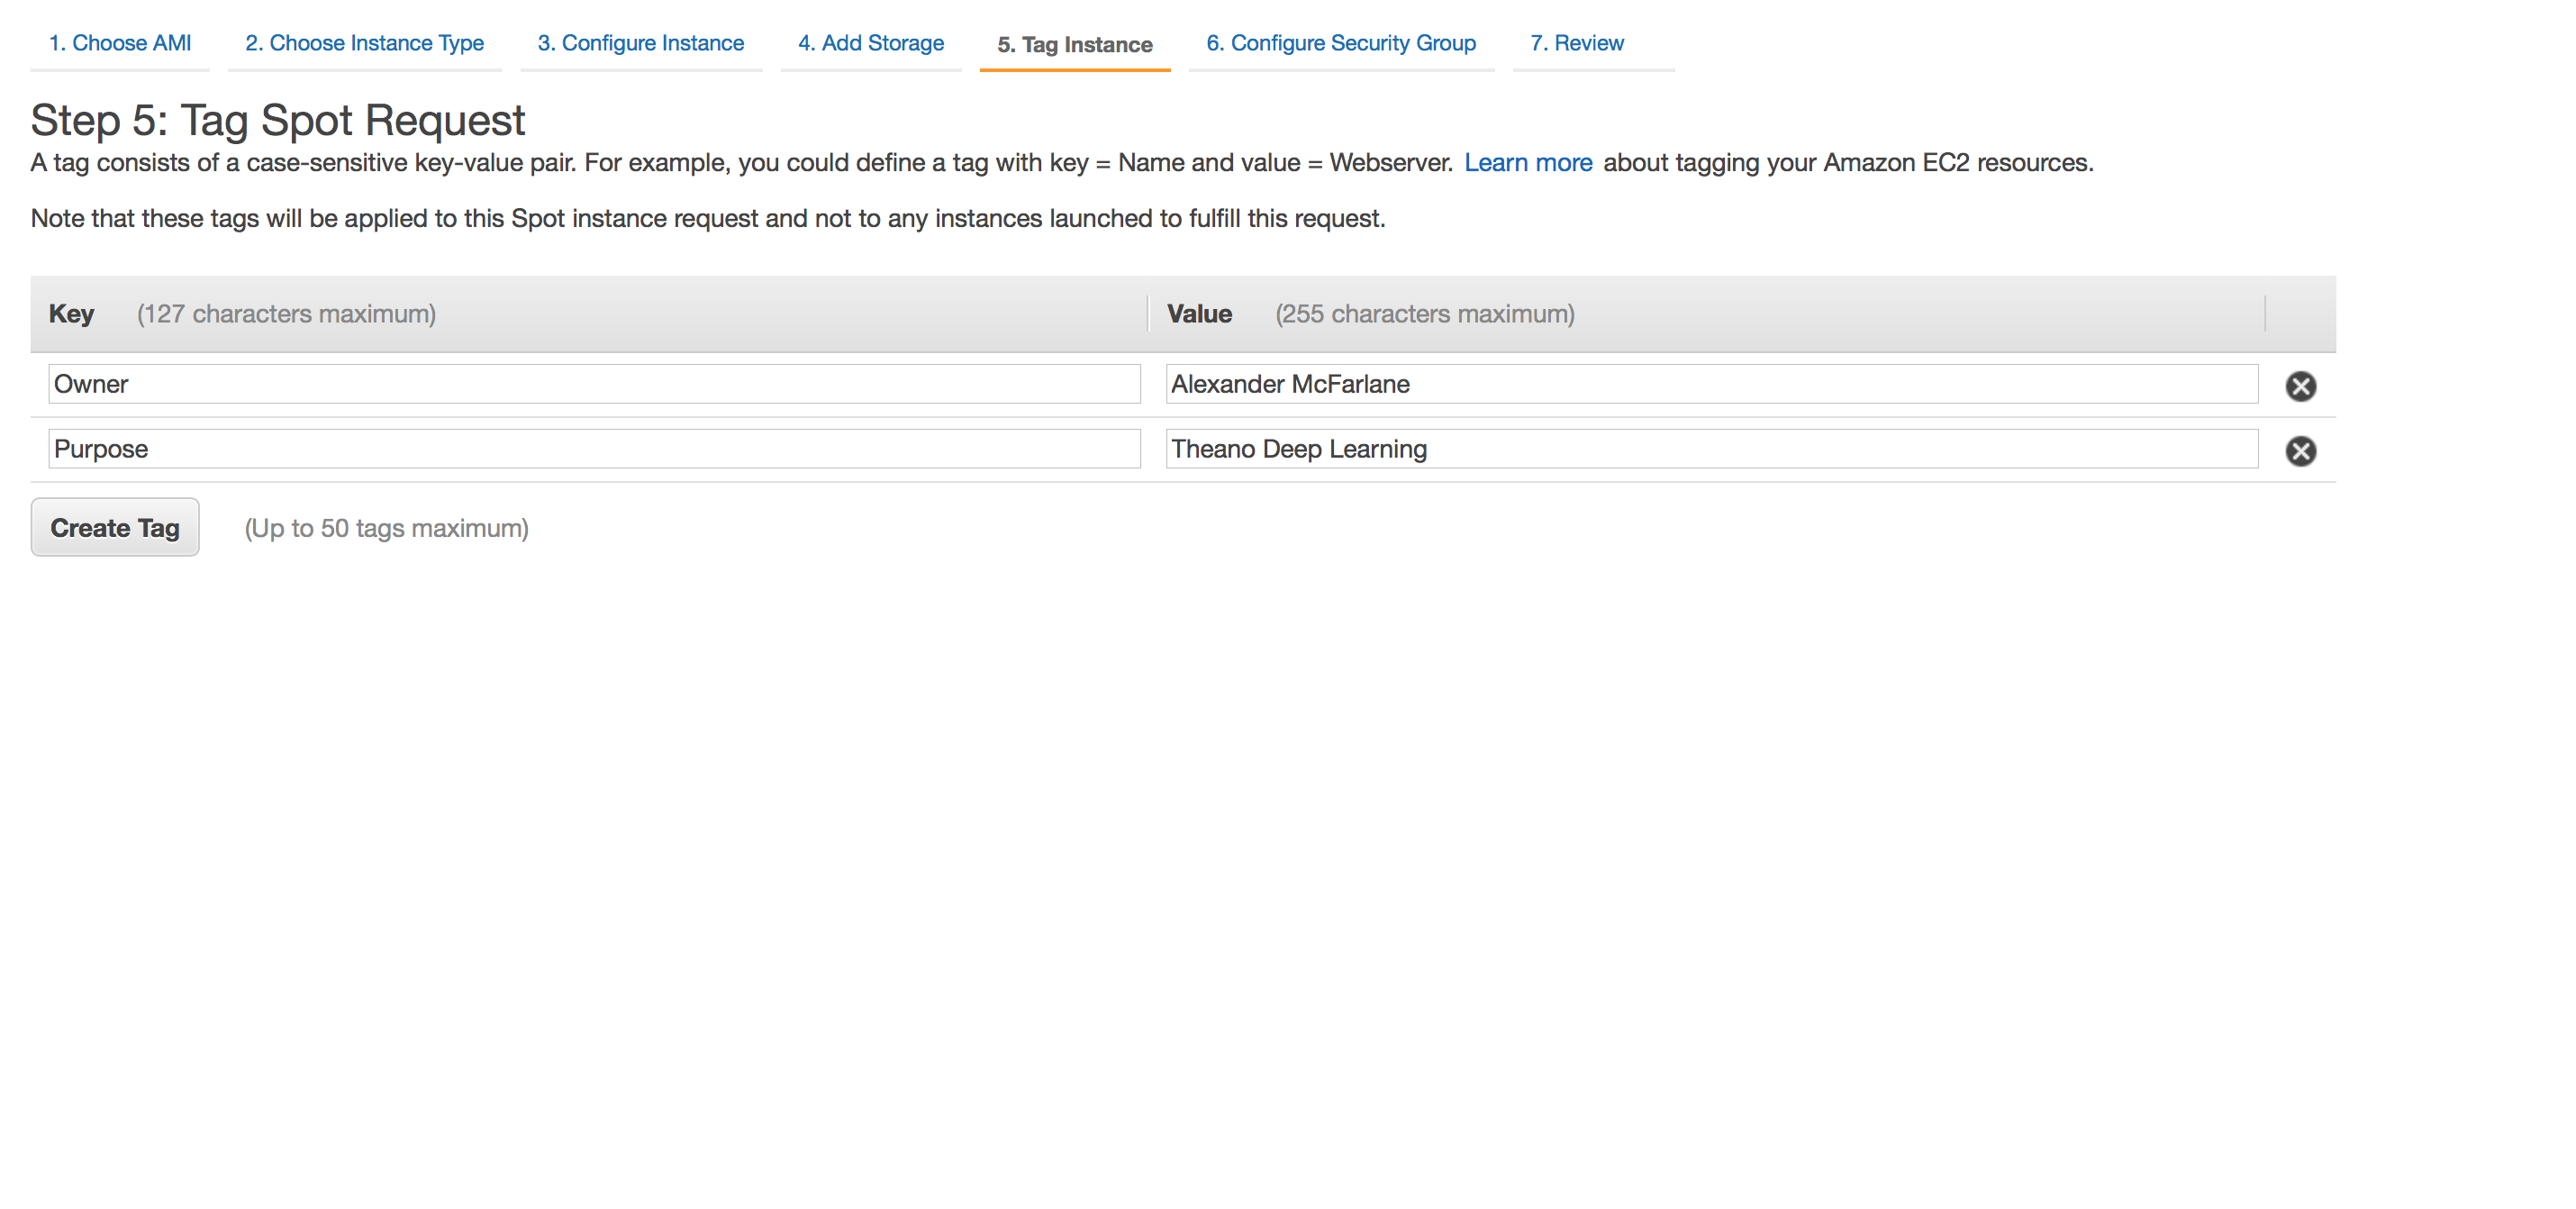
Create Key-Value Pair
This will save some effort later. Create a key-value pair and make sure to save the .pem file
securely after doing so.
Storing the Key Properly
It is advisable to store the key with the following set of commands
#set filename
filename=pem_filename.pem
# create a root directory for SSH
mkdir ~/.ssh
# sometimes the files come from amazon as ".pem.txt"
mv ~/Downloads/${filename}* ~/.ssh/${filename}

# change permissions so only root can read the file
chmod 400 ~/.ssh/${filename}
{
    echo "Host *amazonaws.com"
    echo "IdentityFile ~/.ssh/${filename}"
    echo "User ubuntu"
} > ~/.ssh/config
Create AMI
Astute observers will notice I have Oregon in some of the screenshots instead of Ireland. That is because I forgot to change my region in my first attempt!
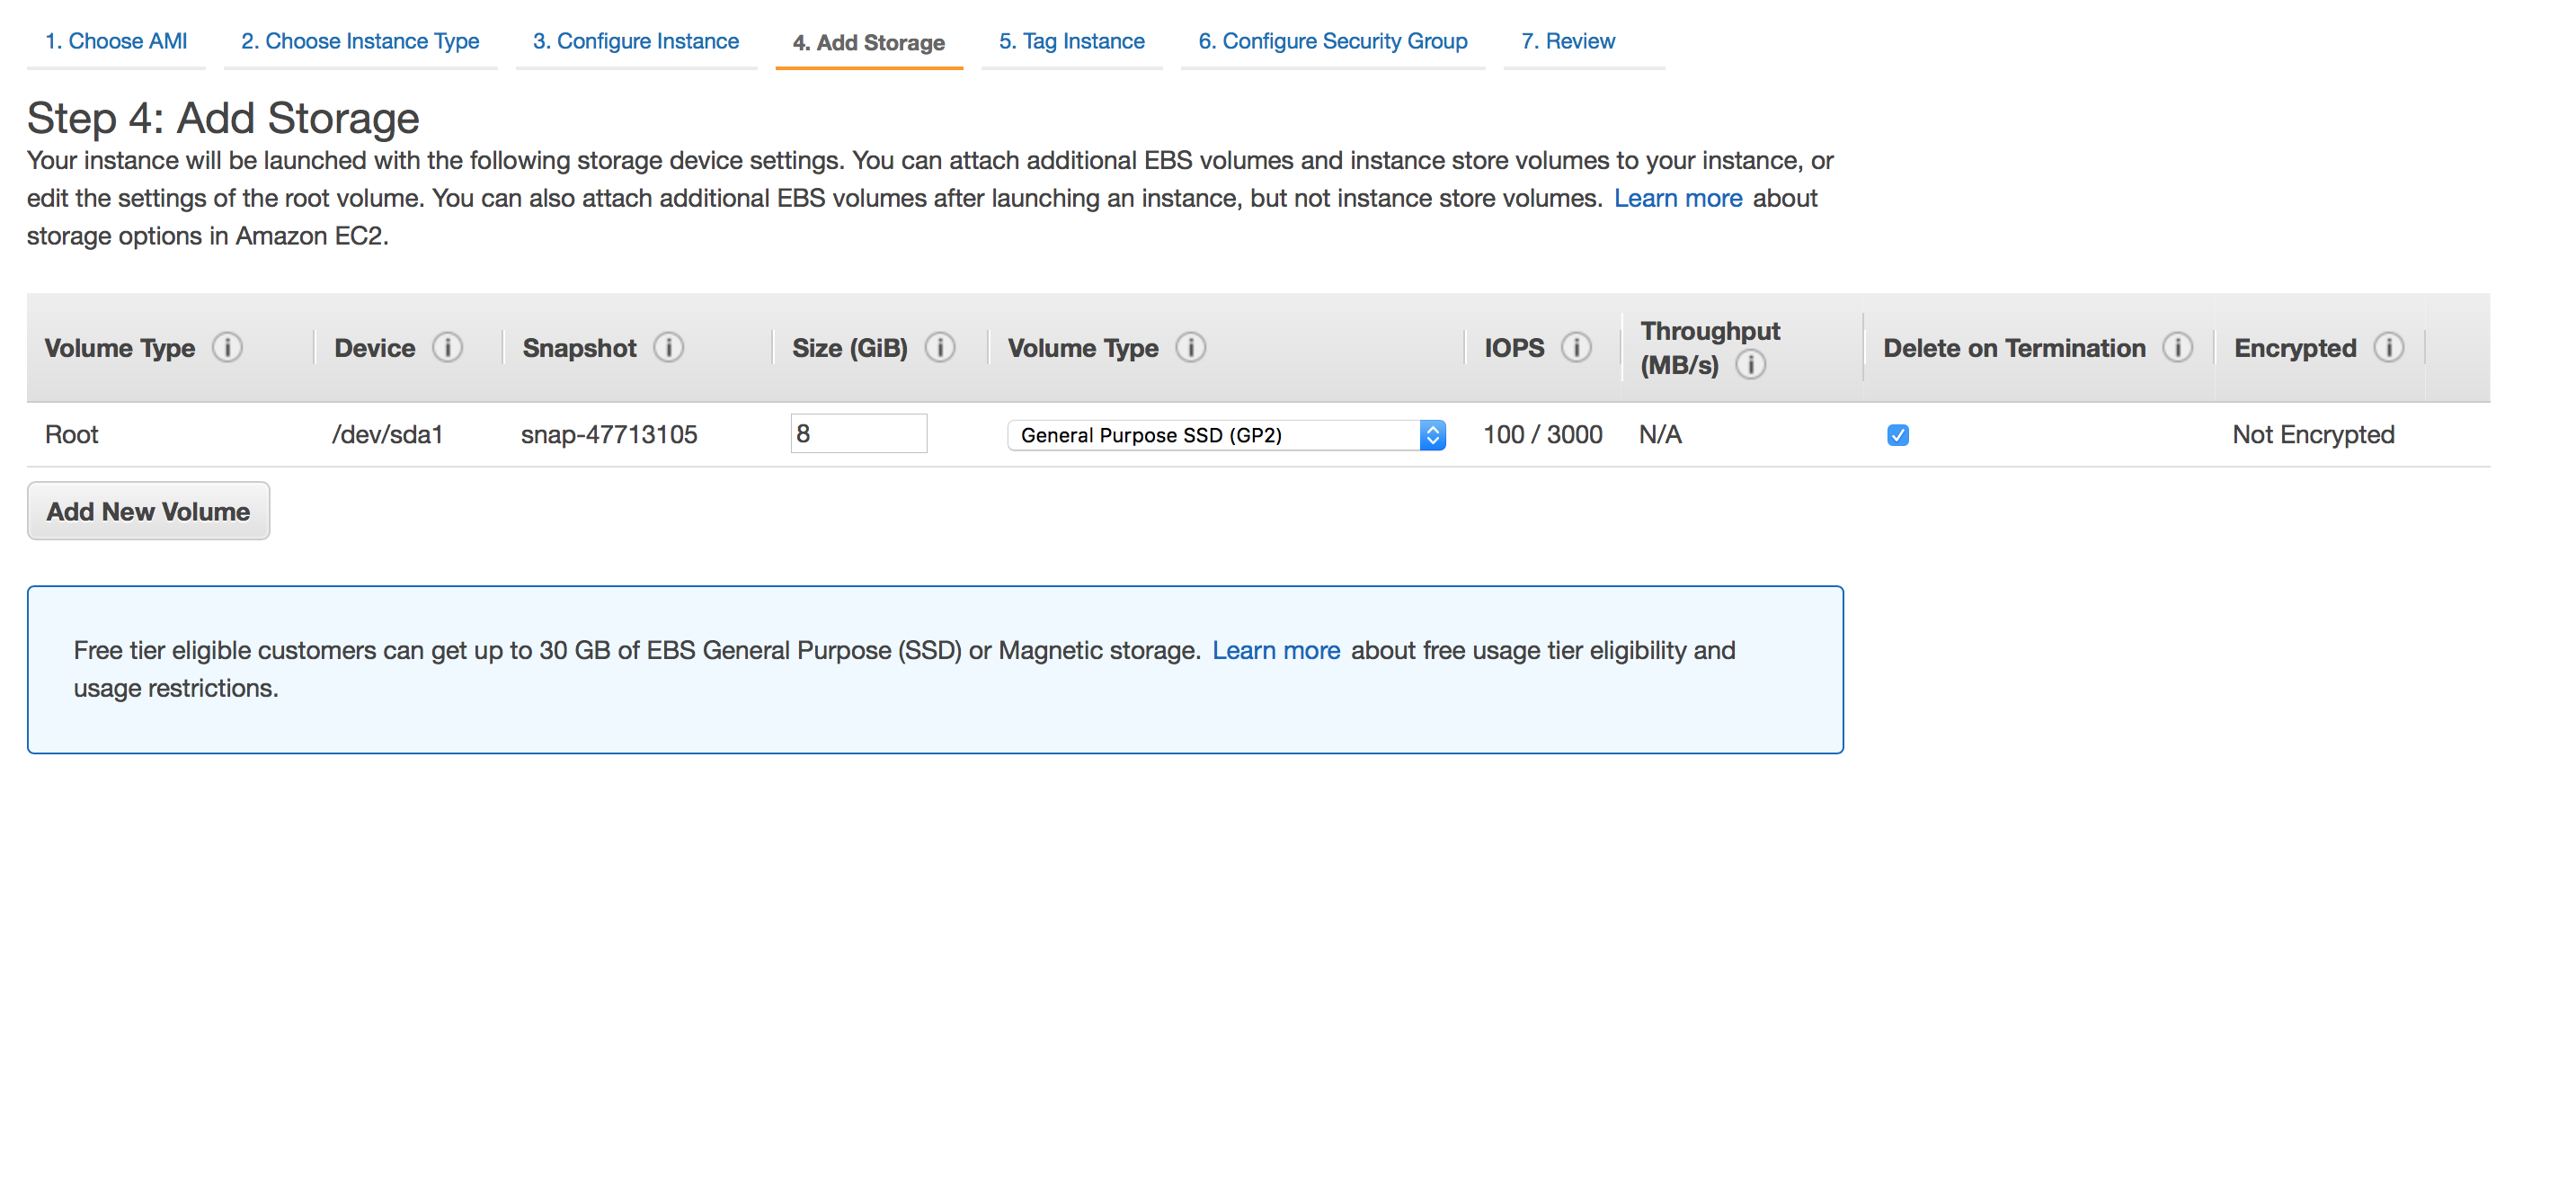
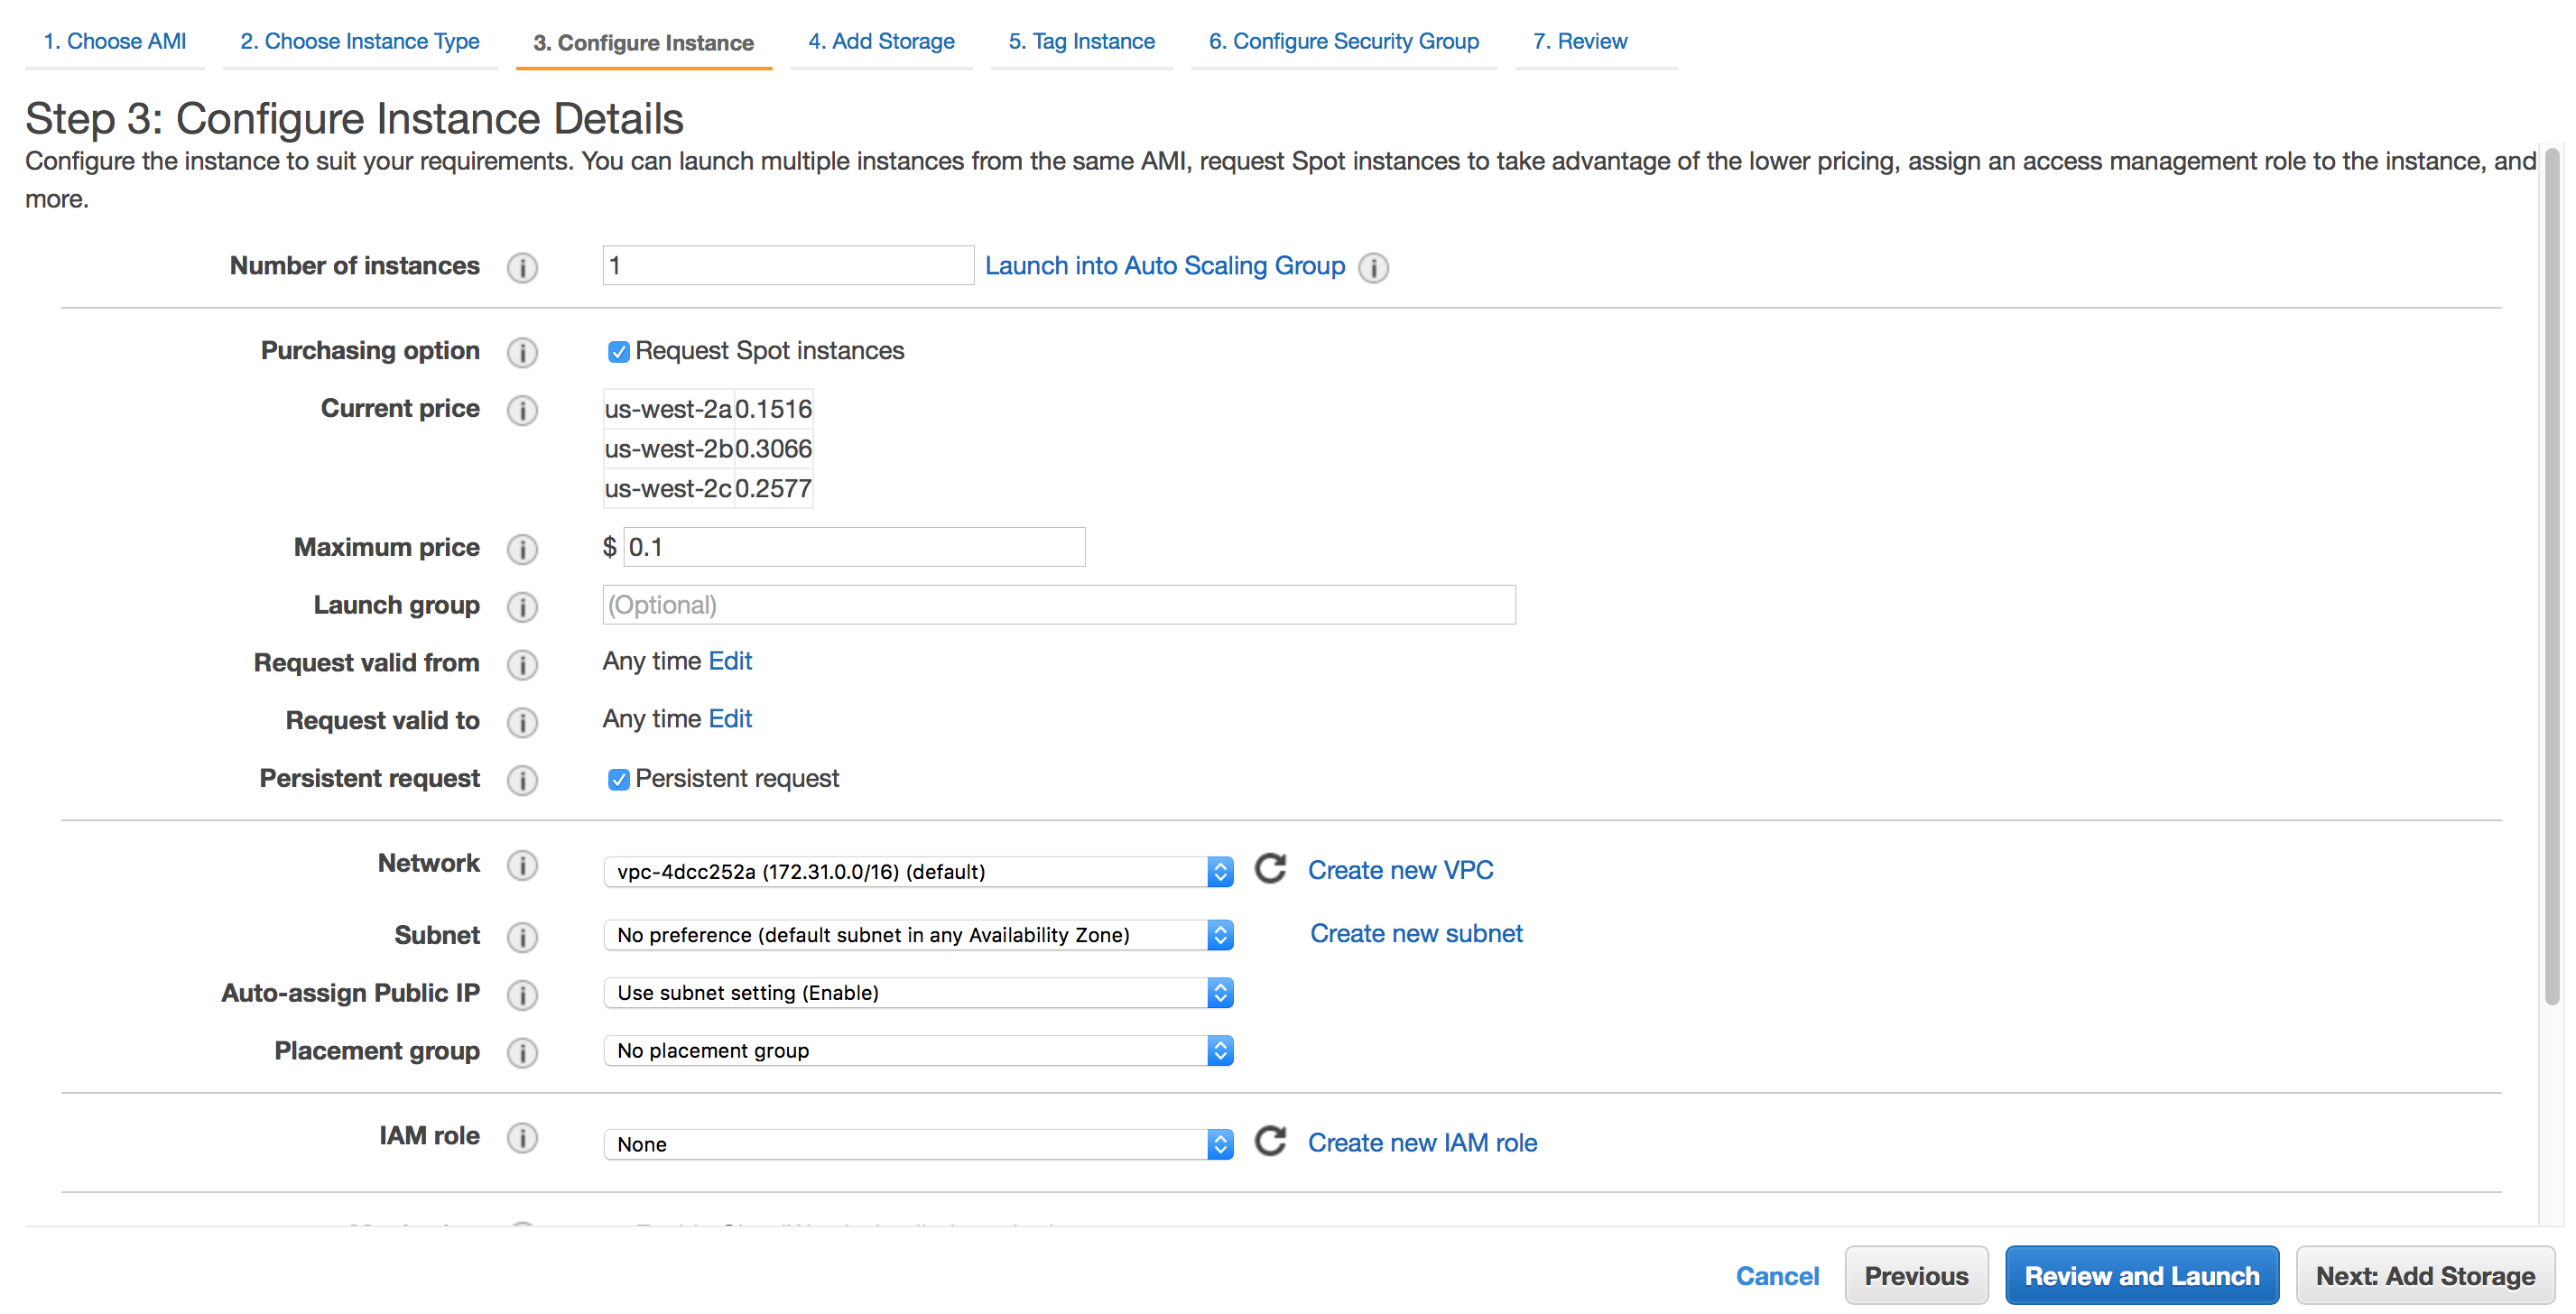
Other Settings
- A few more settings are required
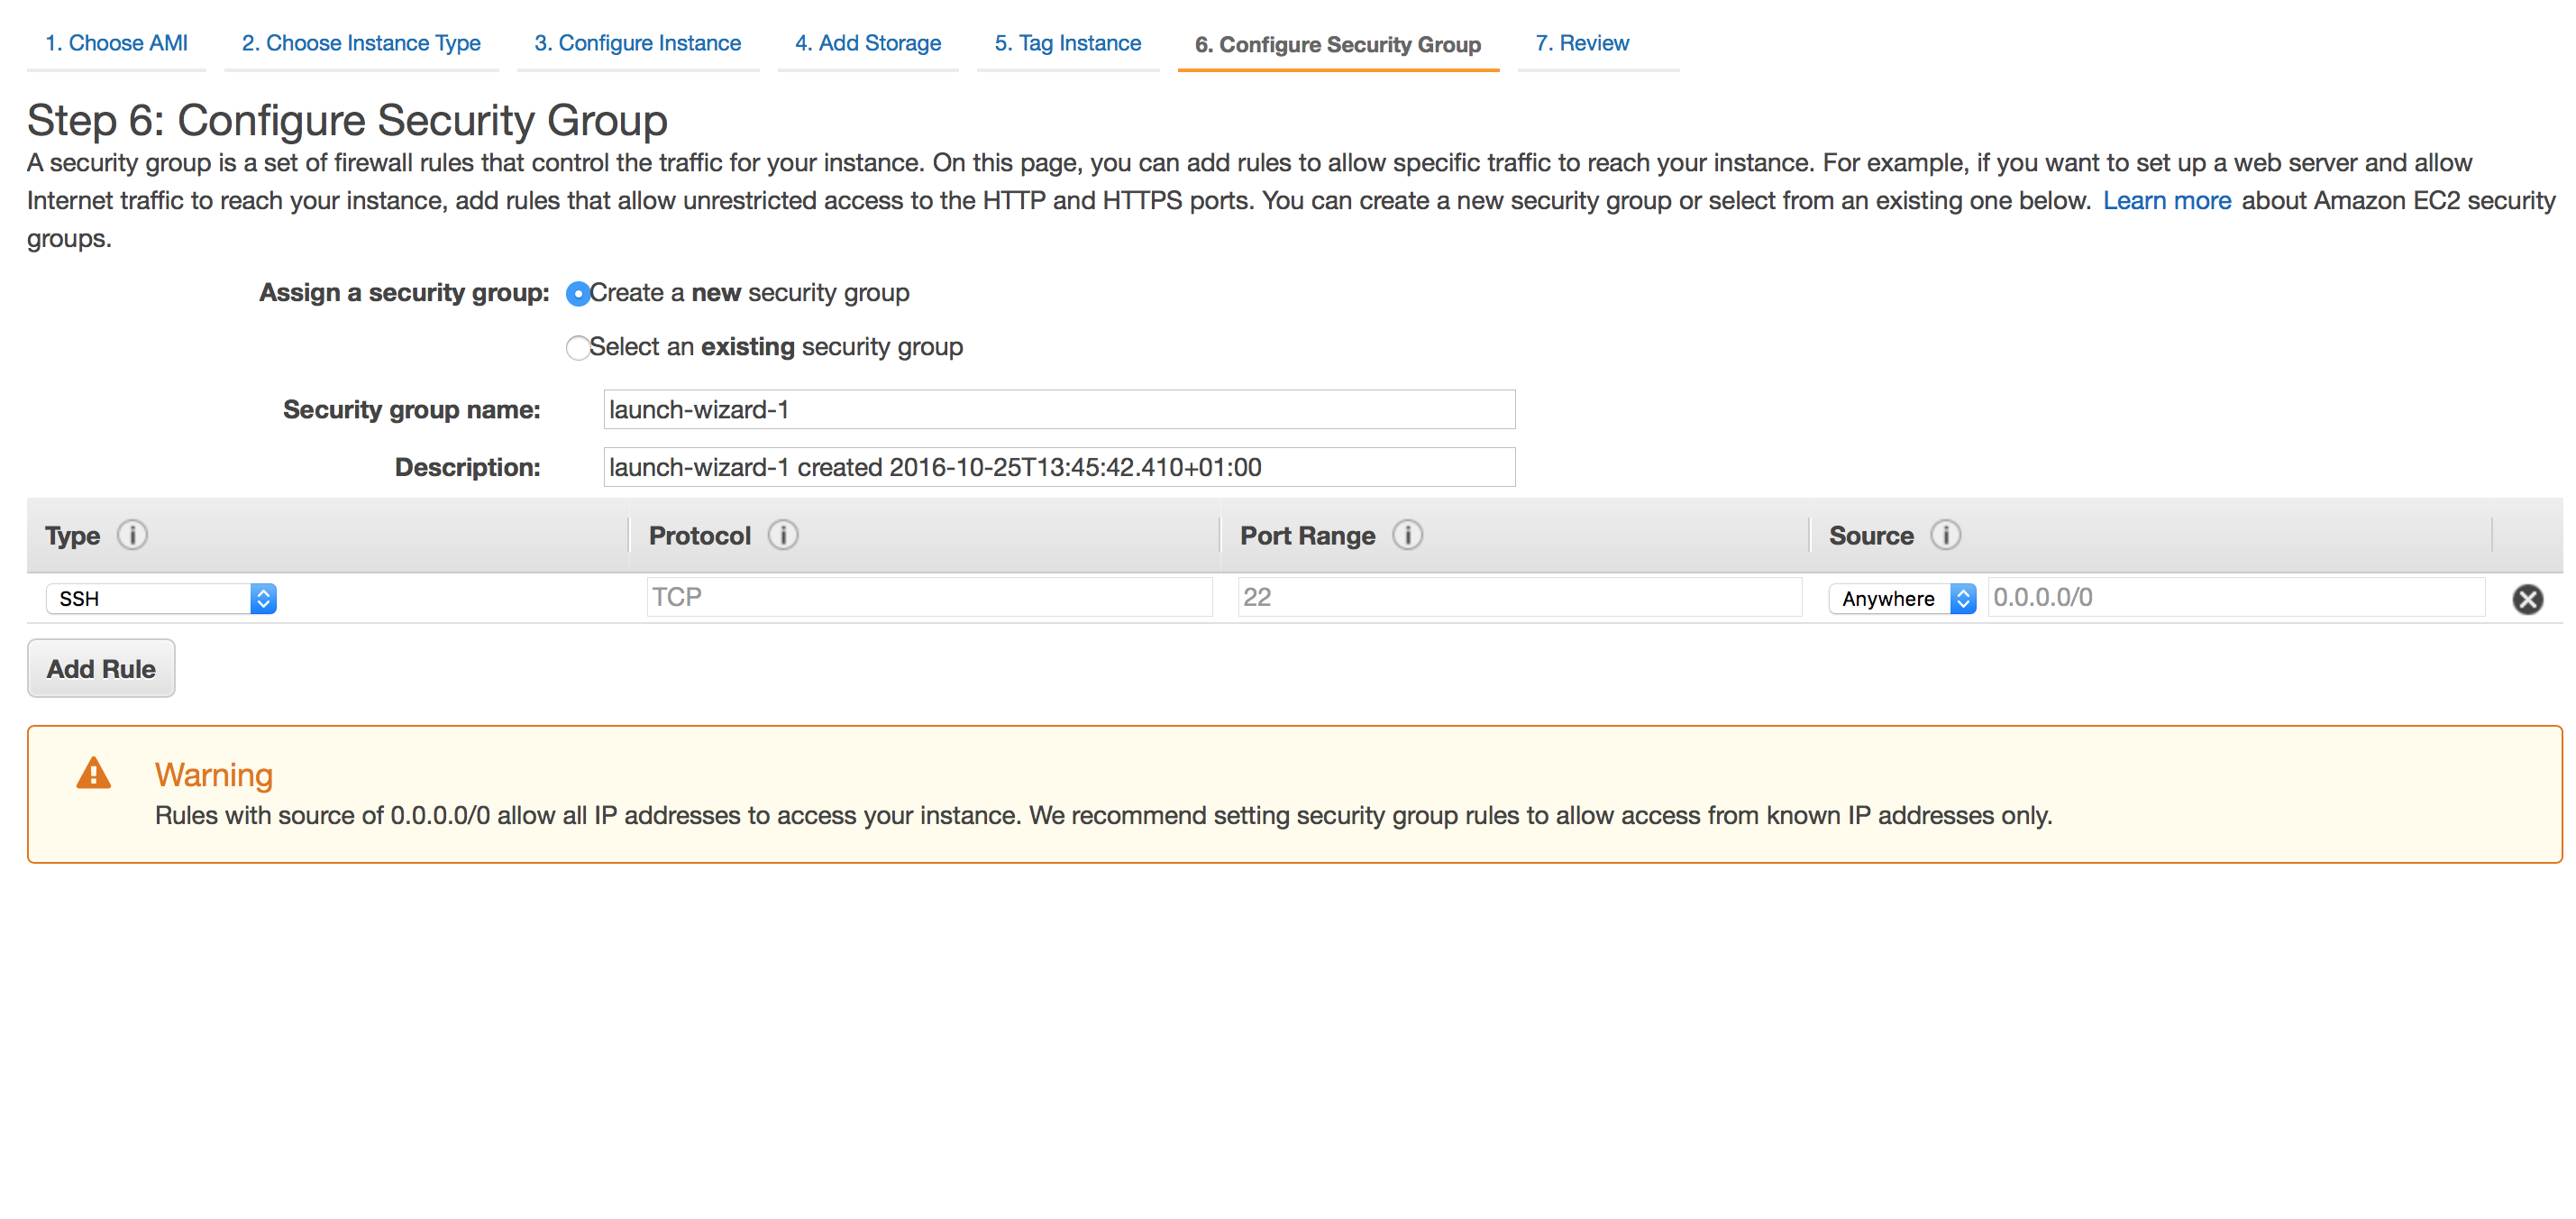
At this point I would recommend not selecting a GPU instance and instead changing it to a Free Tier Instance. This will be how I continue the guide.
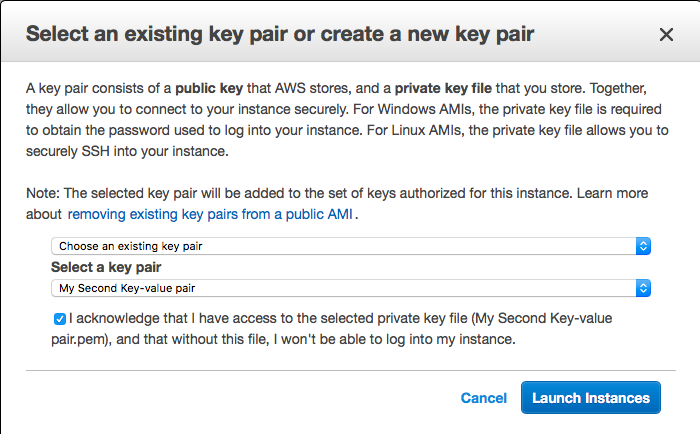
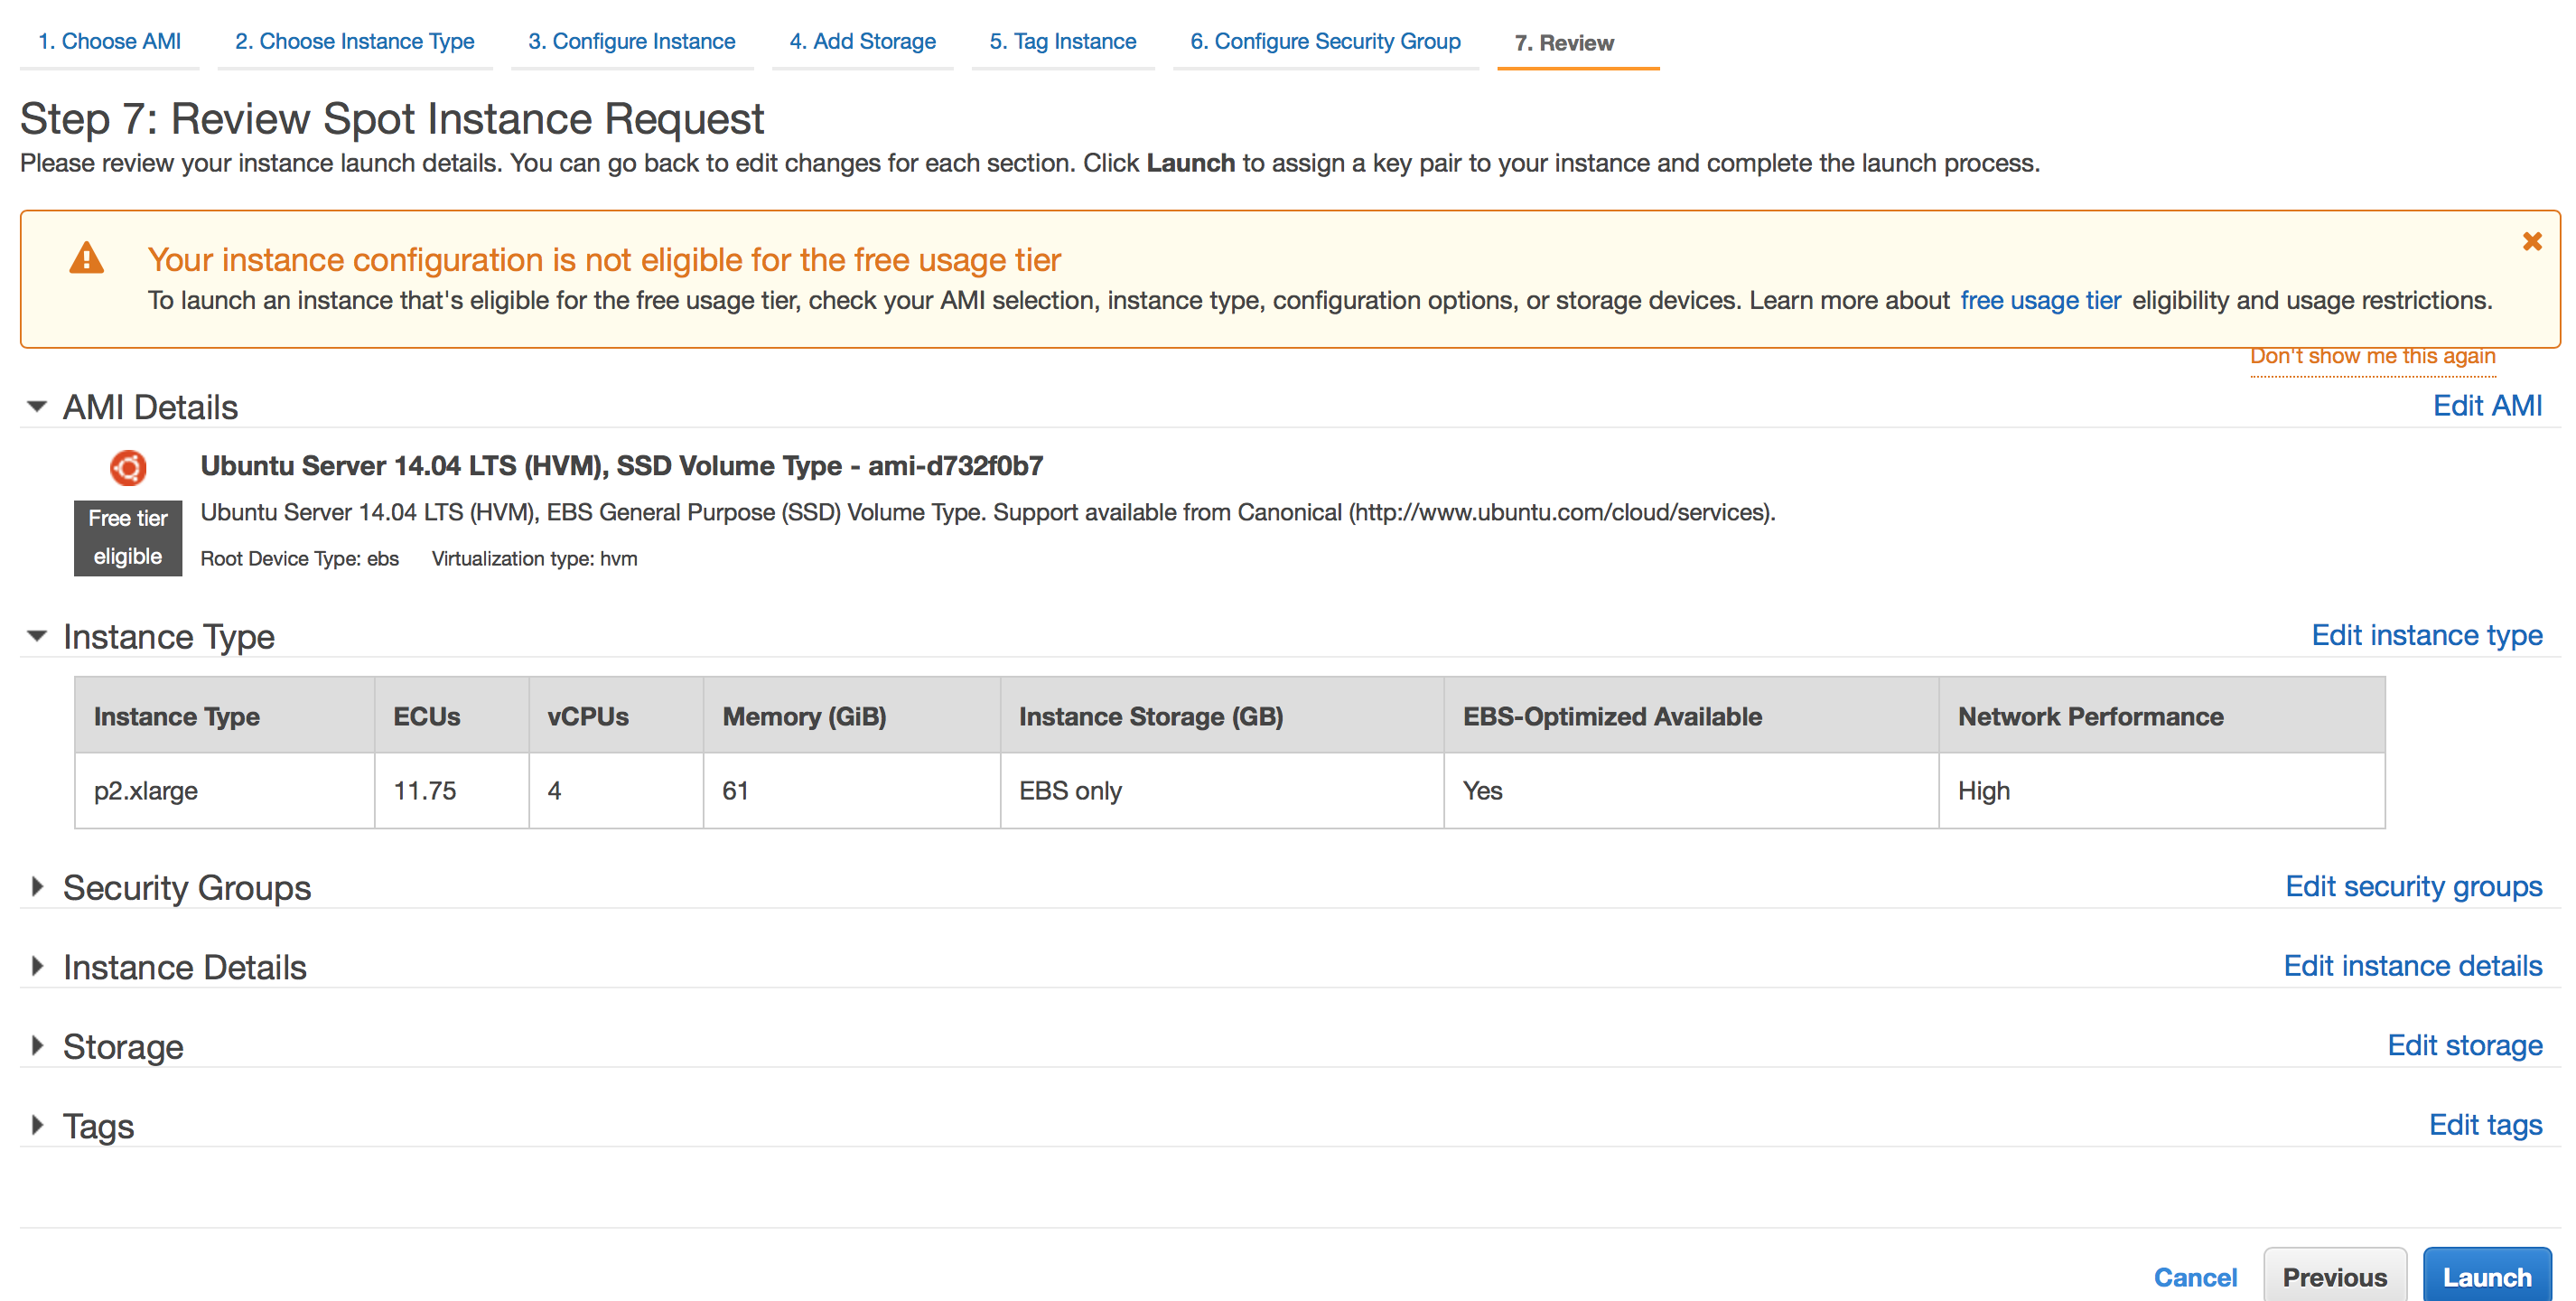
Launch and Connect with SSH
- Launching an instance will start the billing process
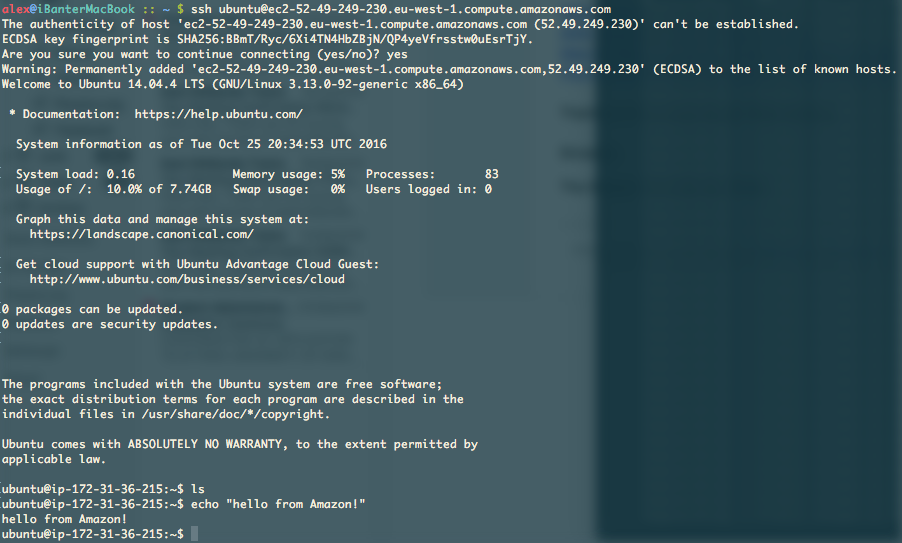
The SSH process is very simple if the steps for Storing the Key Properly were followed
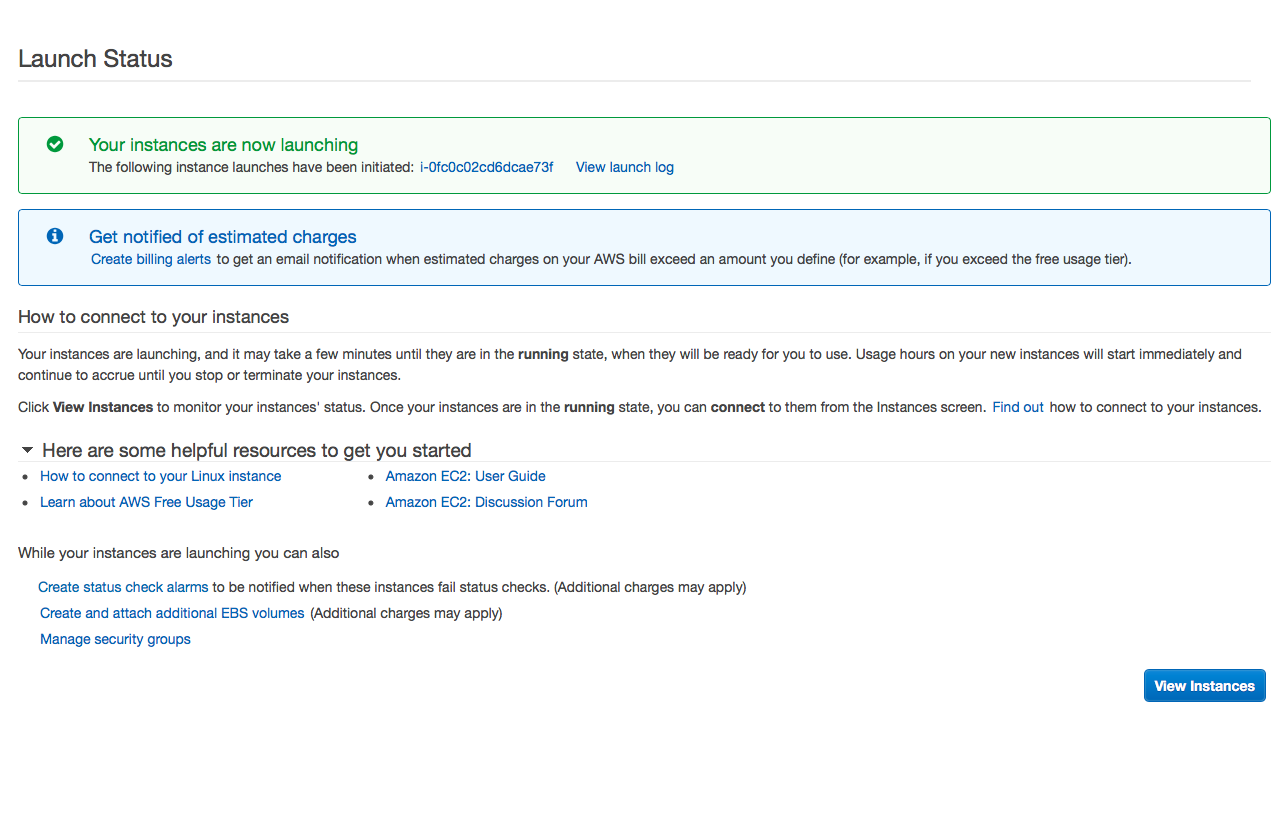
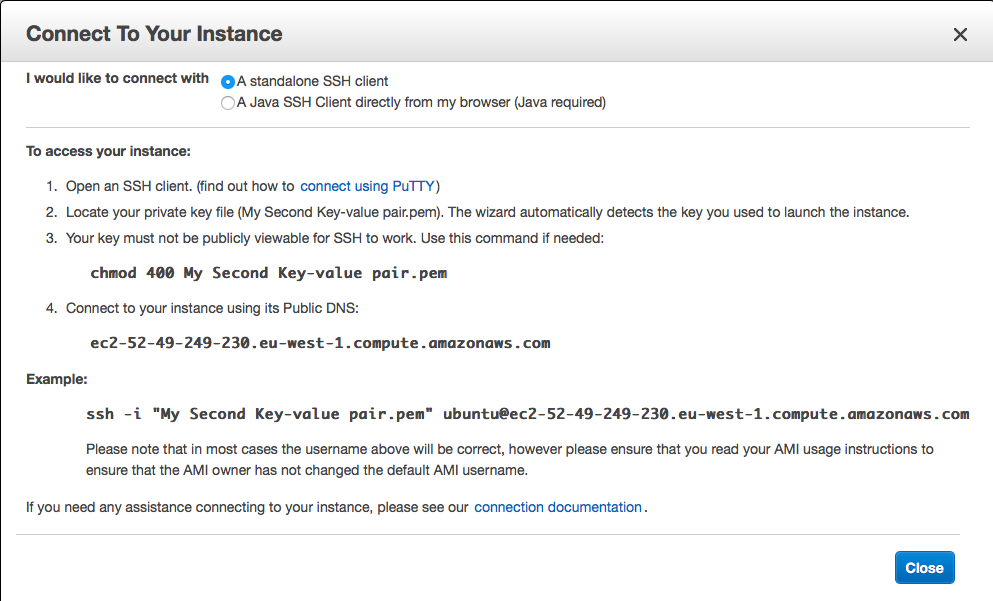
You can then SSH into the Instance simply with the command
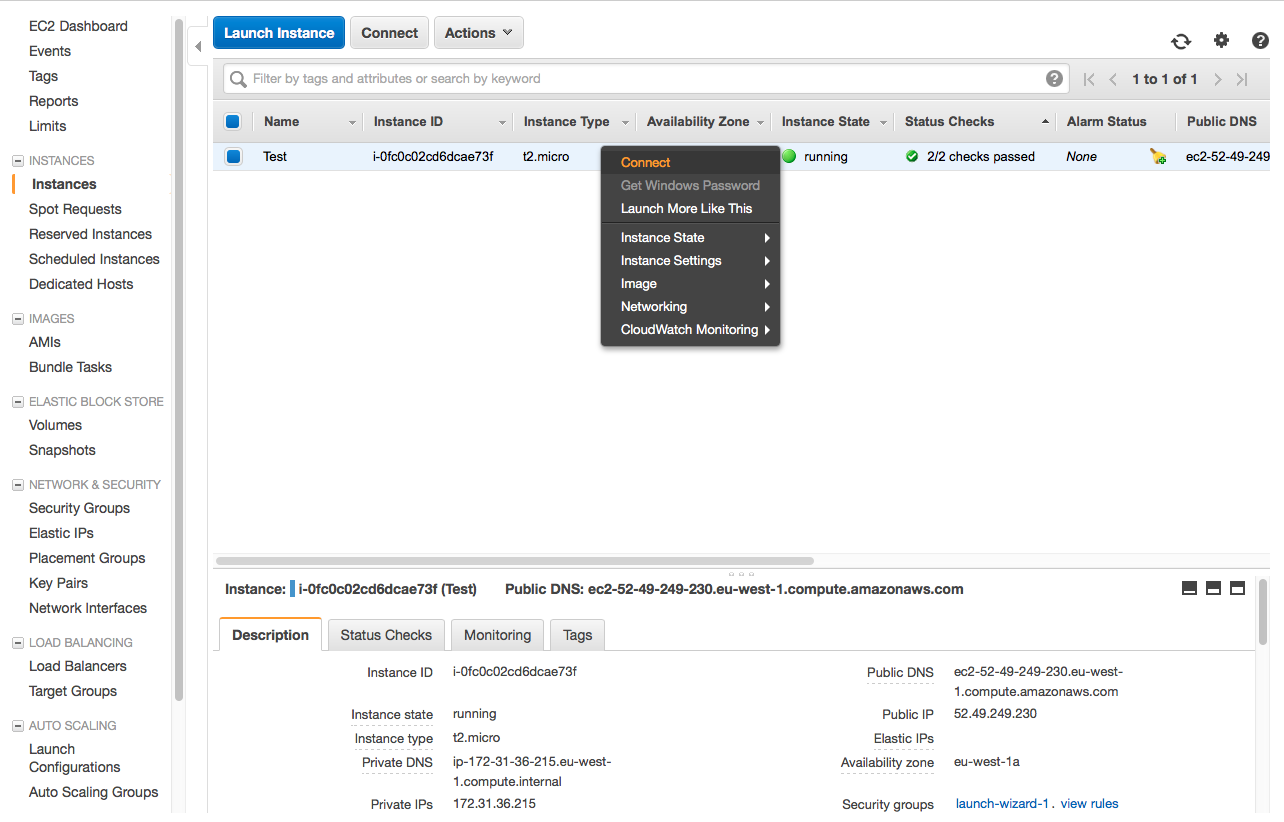
ssh ubuntu@[DNS]The correct DNS will be different for each Instance. Obtain this information by
- right-clicking the instance in the dashboard and selecting connect
- or selecting the Instance and viewing the Description below
Close Instance
Make sure that you check the instance has been closed in addition to the Spot request! I received a 31 hour bill for an unclosed GPU Compute instance that I had thought I closed which was rather annoying.
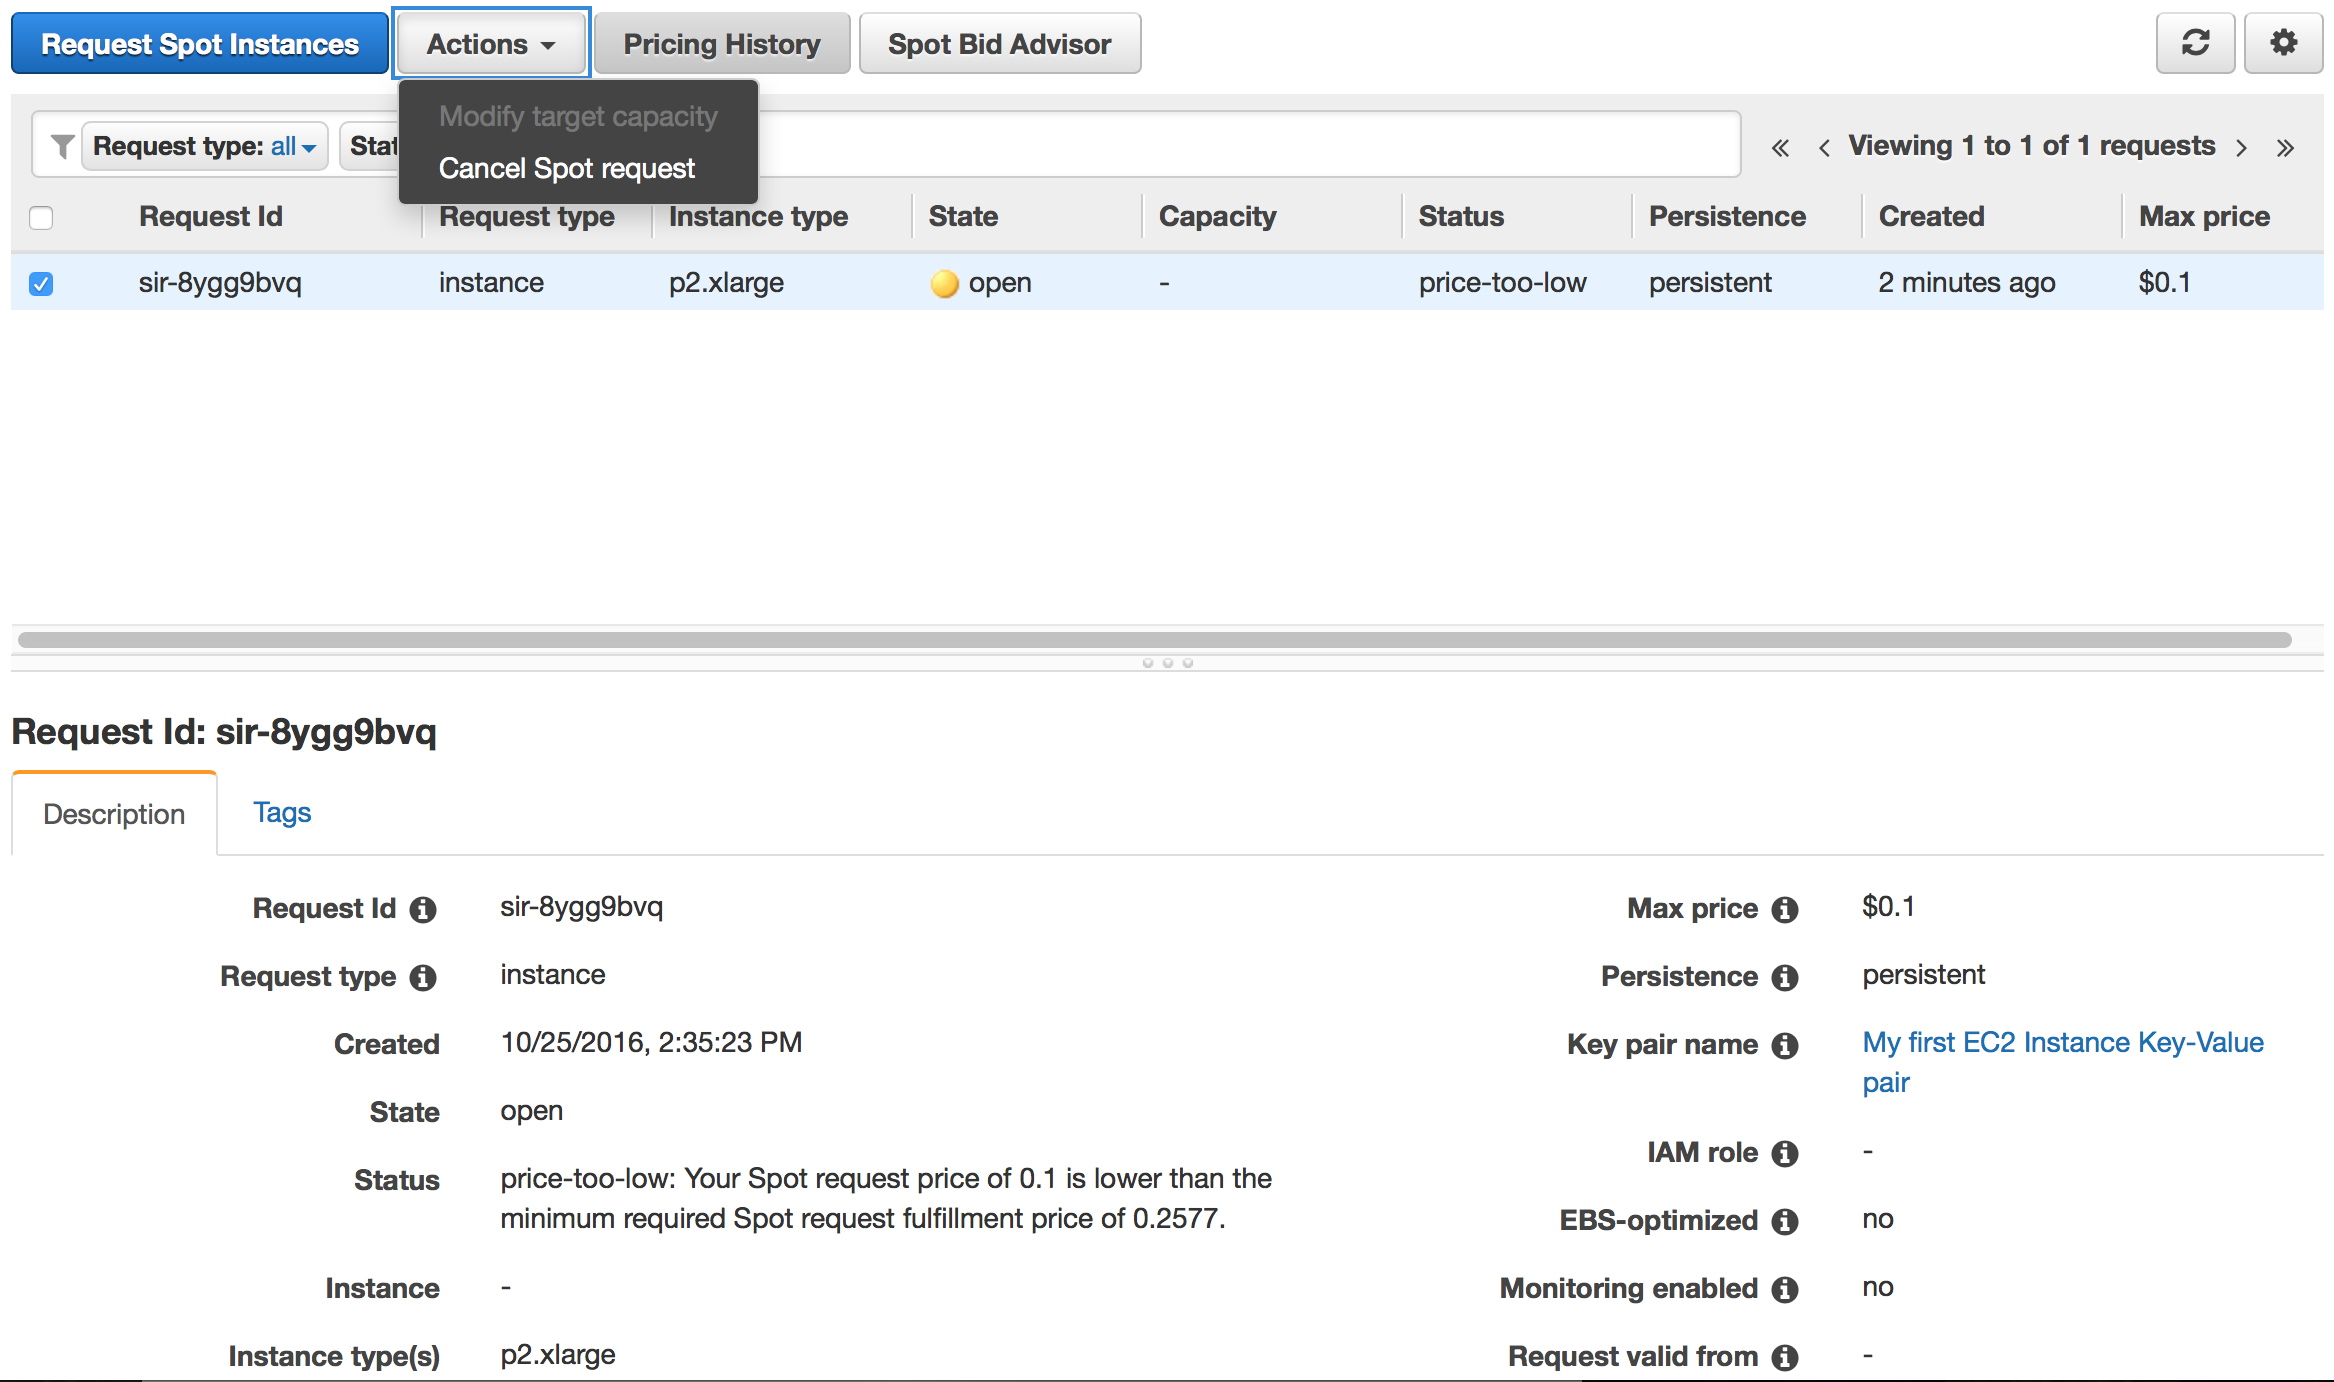
Usage Plans for GPU Compute Instances
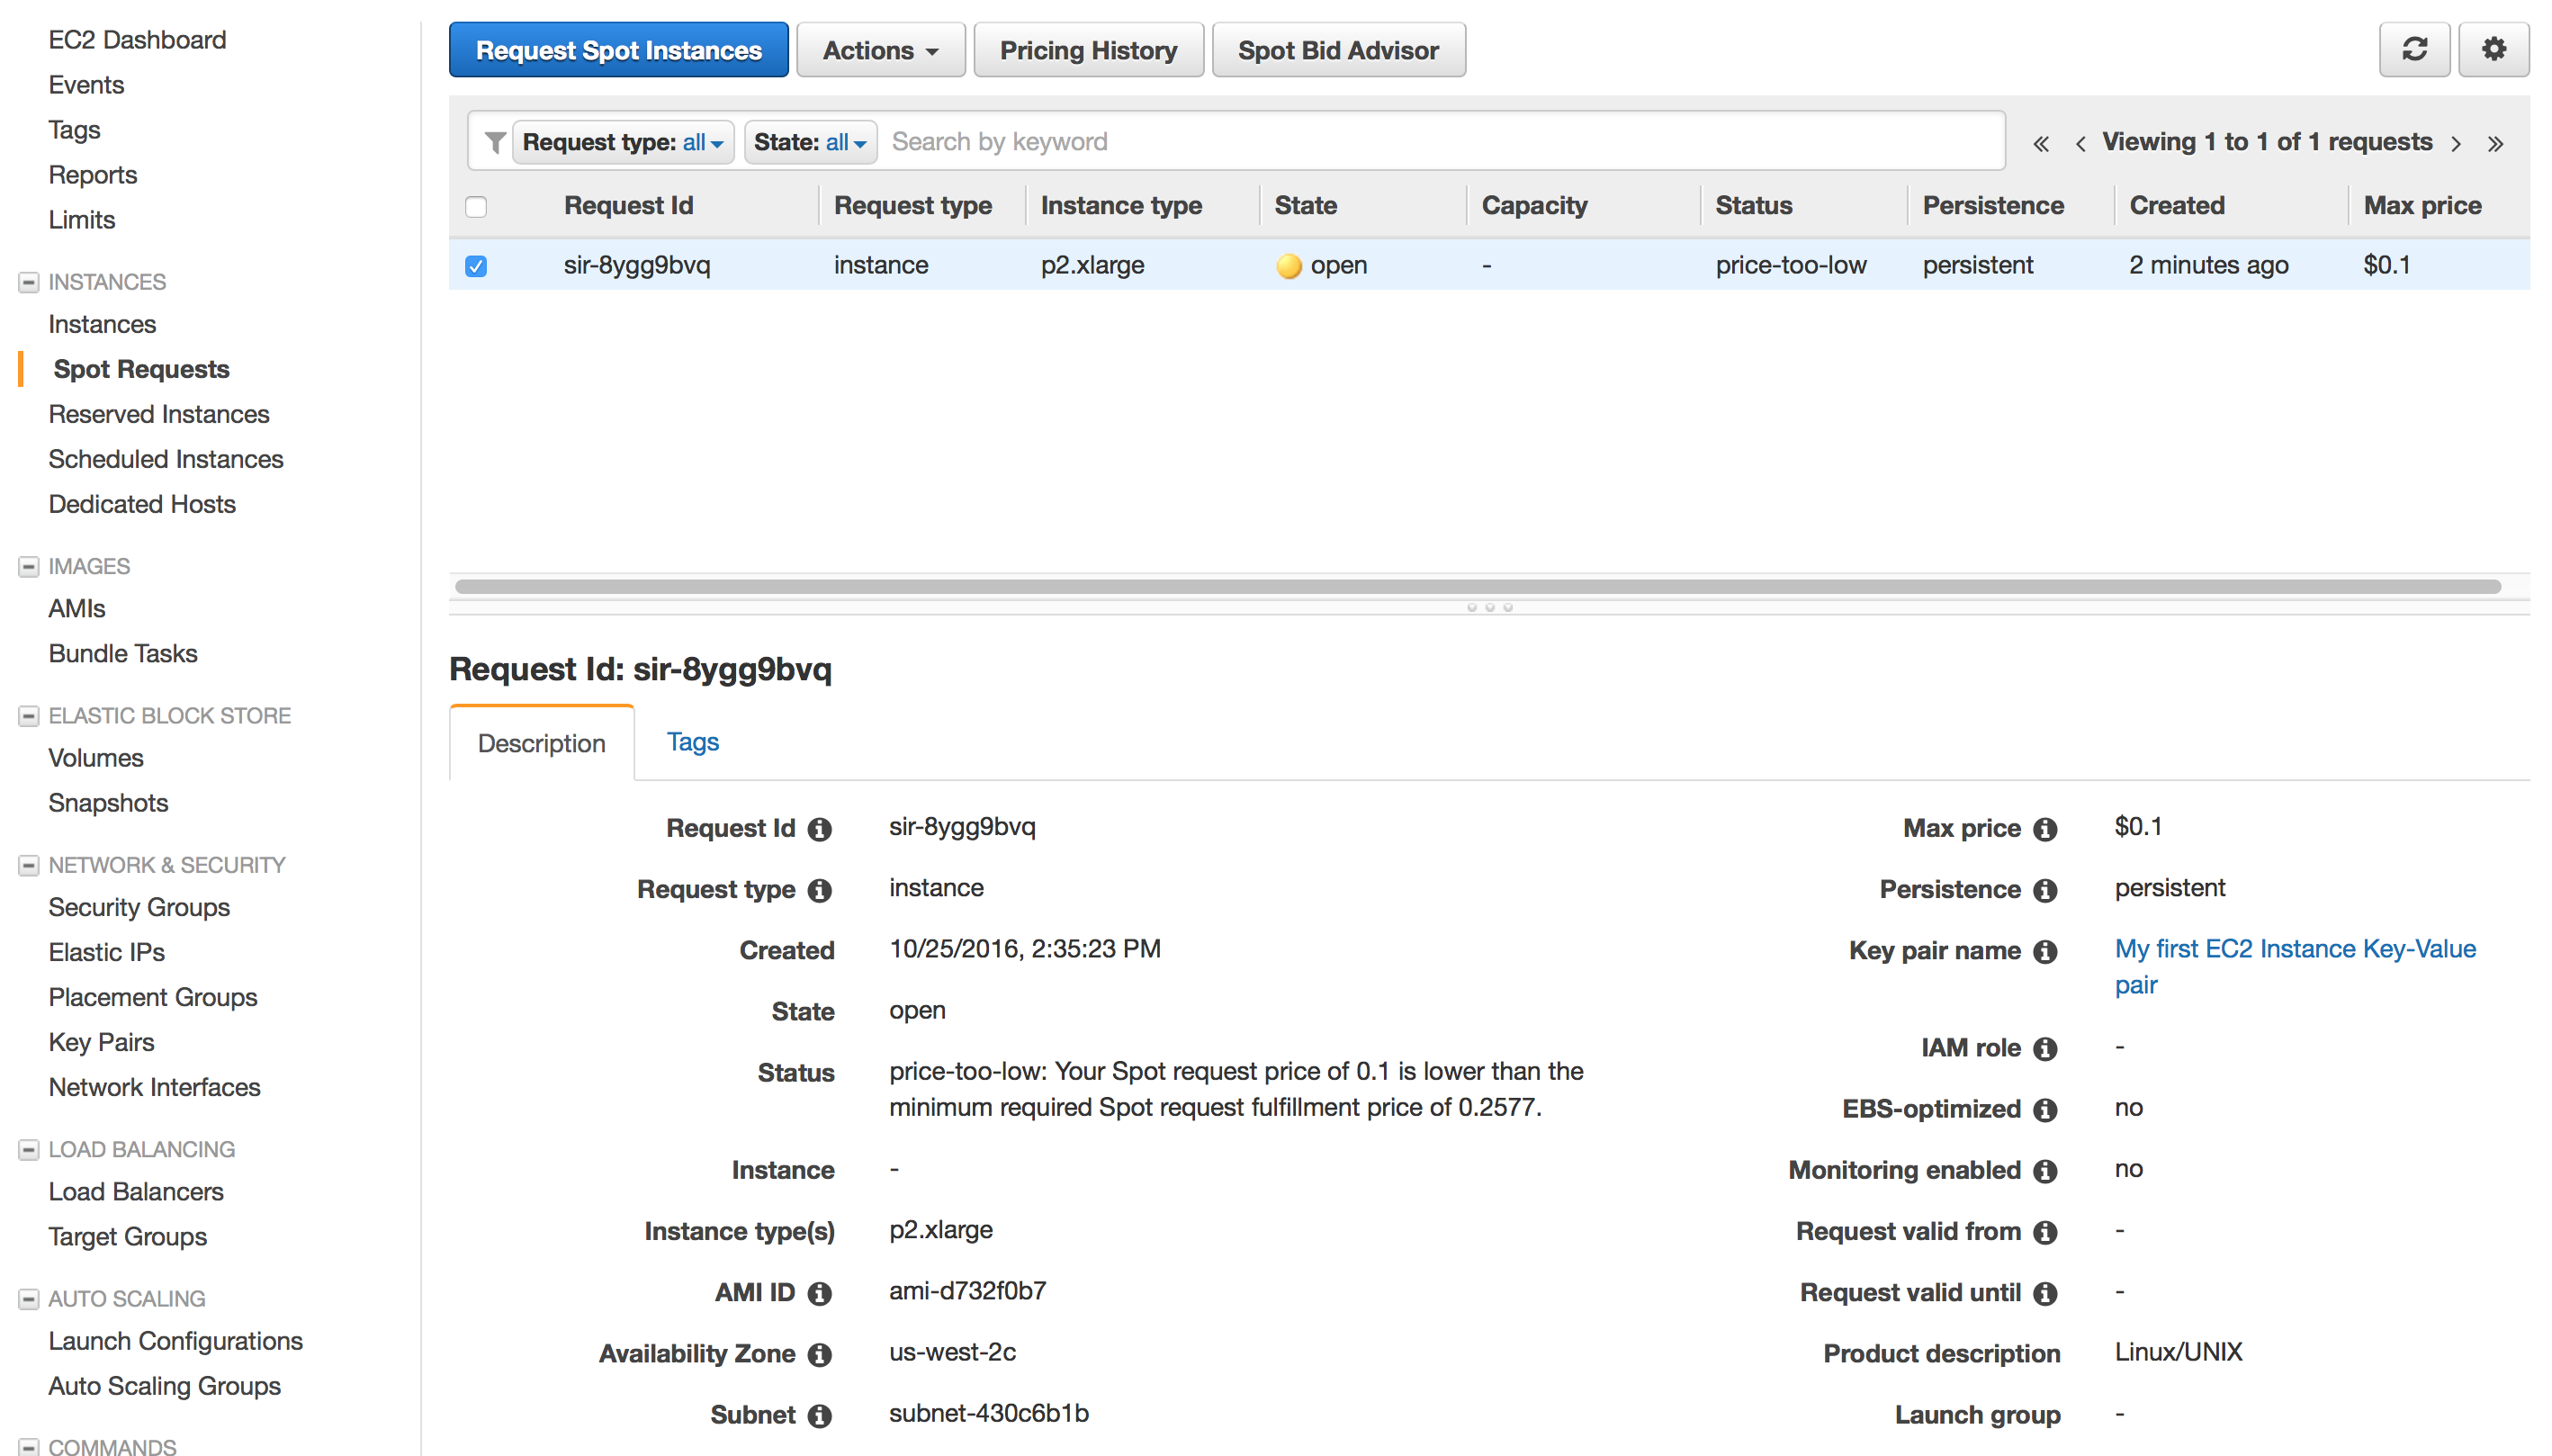
- I selected a Spot Instance with a maximum bid of $0.10 / hour
- Persistent Requests will be resubmitted every time your Spot Instance is terminated
This excellent graphic from the AWS docs demonstrates the basic idea of a Spot Instance
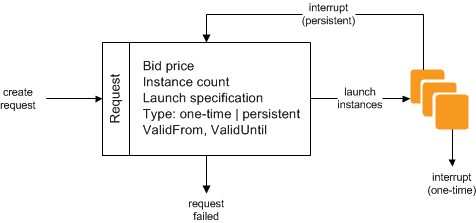
When in production and selecting a Spot payment method, it may be that the spot is higher than your current maximum bid. If this happens, the Instance will start only when the Spot falls into range. It’s sensible to look at price history if you wish to minimise interruptions.
Using EC2 for Deep Learning
See Part 2 for setting up Theano on Amazon Web Services for Deep Learning
Alternatives
There are alternative offerings to Amazon EC2.
Out of these the only standout is Microsoft Azure which is discussed in a following blog